Tag: Health

  • Sprouts Vs. Microgreens

    Sprouts Vs. Microgreens

    Are these sprouts?  Are these microgreens?  Is their a difference between the two?  The answer is: Yes there is a difference.  I grow both and if you keep reading, I’ll describe how they differ and which one in my opinion is the overall winner in the Sprouts vs. Microgreens battle.

    Growing Sprouts vs. Microgreens

    So why would anyone want to grow sprouts or microgreens, especially instead of a full grown plant of the same variety?  There are some easy answers here and some others that are more nuanced.

    Lack of Space

    Probably the most obvious reason for growing either of these is a lack of gardening space.   Many of the varieties used for both sprouts and microgreens would require feet of space just for a few plants.  You could grow hundreds or thousands of sprouts or microgreens in this same amount of space.

    Lack of Time

    Another reason for growing sprouts or microgreens is a lack of time.  For full grown plants, you will need a month or more from seeding time before you can actually harvest.  Harvest times for sprouts and microgreens are on the order of days/weeks.

    Lack of Cooperative Weather

    Due to the space and time saving benefits of growing sprouts and microgreens, you can make due with less than ideal weather conditions.  This is mostly because you can easily grow them in your kitchen.  Unlike growing full grown plants the need for bright light and always warm conditions is not necessary.

    Differences in Sprouts vs. Microgreens

    Before growing sprouts and microgreens,  you need to decide which product you ultimately want to harvest.  The following factors should be considered:

    Taste

    Different varieties of sprouts often taste very similar.  Microgreens have more flavor, often this is a more pronounced flavor from the fully grown plant.

    Intended Use

    Sprouts are often served as a garnish.  Microgreens can be combined to form a salad on their own, or used in much the same way as the greens from their fully grown counterparts.  Both can be used in smoothies.  It is recommended that you don’t cook microgreens as this will often degrade the nutrients that are present.

    Nutrition

    Sprouts will only provide the nutritional aspects of what is included in the raw seed.  This differs greatly based on the variety of seed used.  Many sources state that the sprouting process makes these vitamins and minerals more concentrated and available.  Microgreens typically provide more minerals and often a different nutritional profile than their sprouted counterparts.  I’ll discuss why this is when discussing differences in the growing process.

    How to Grow Sprouts and Microgreens?

    Growing either sprouts or microgreens is a fairly similar process.  In both cases, you start with the same seeds that you would plant in your garden.  Commonly used seeds include brassicas, radishes, grasses, beets, herbs and other greens.  In both cases you provide a wet growing environment, but this is where the process starts to differ.
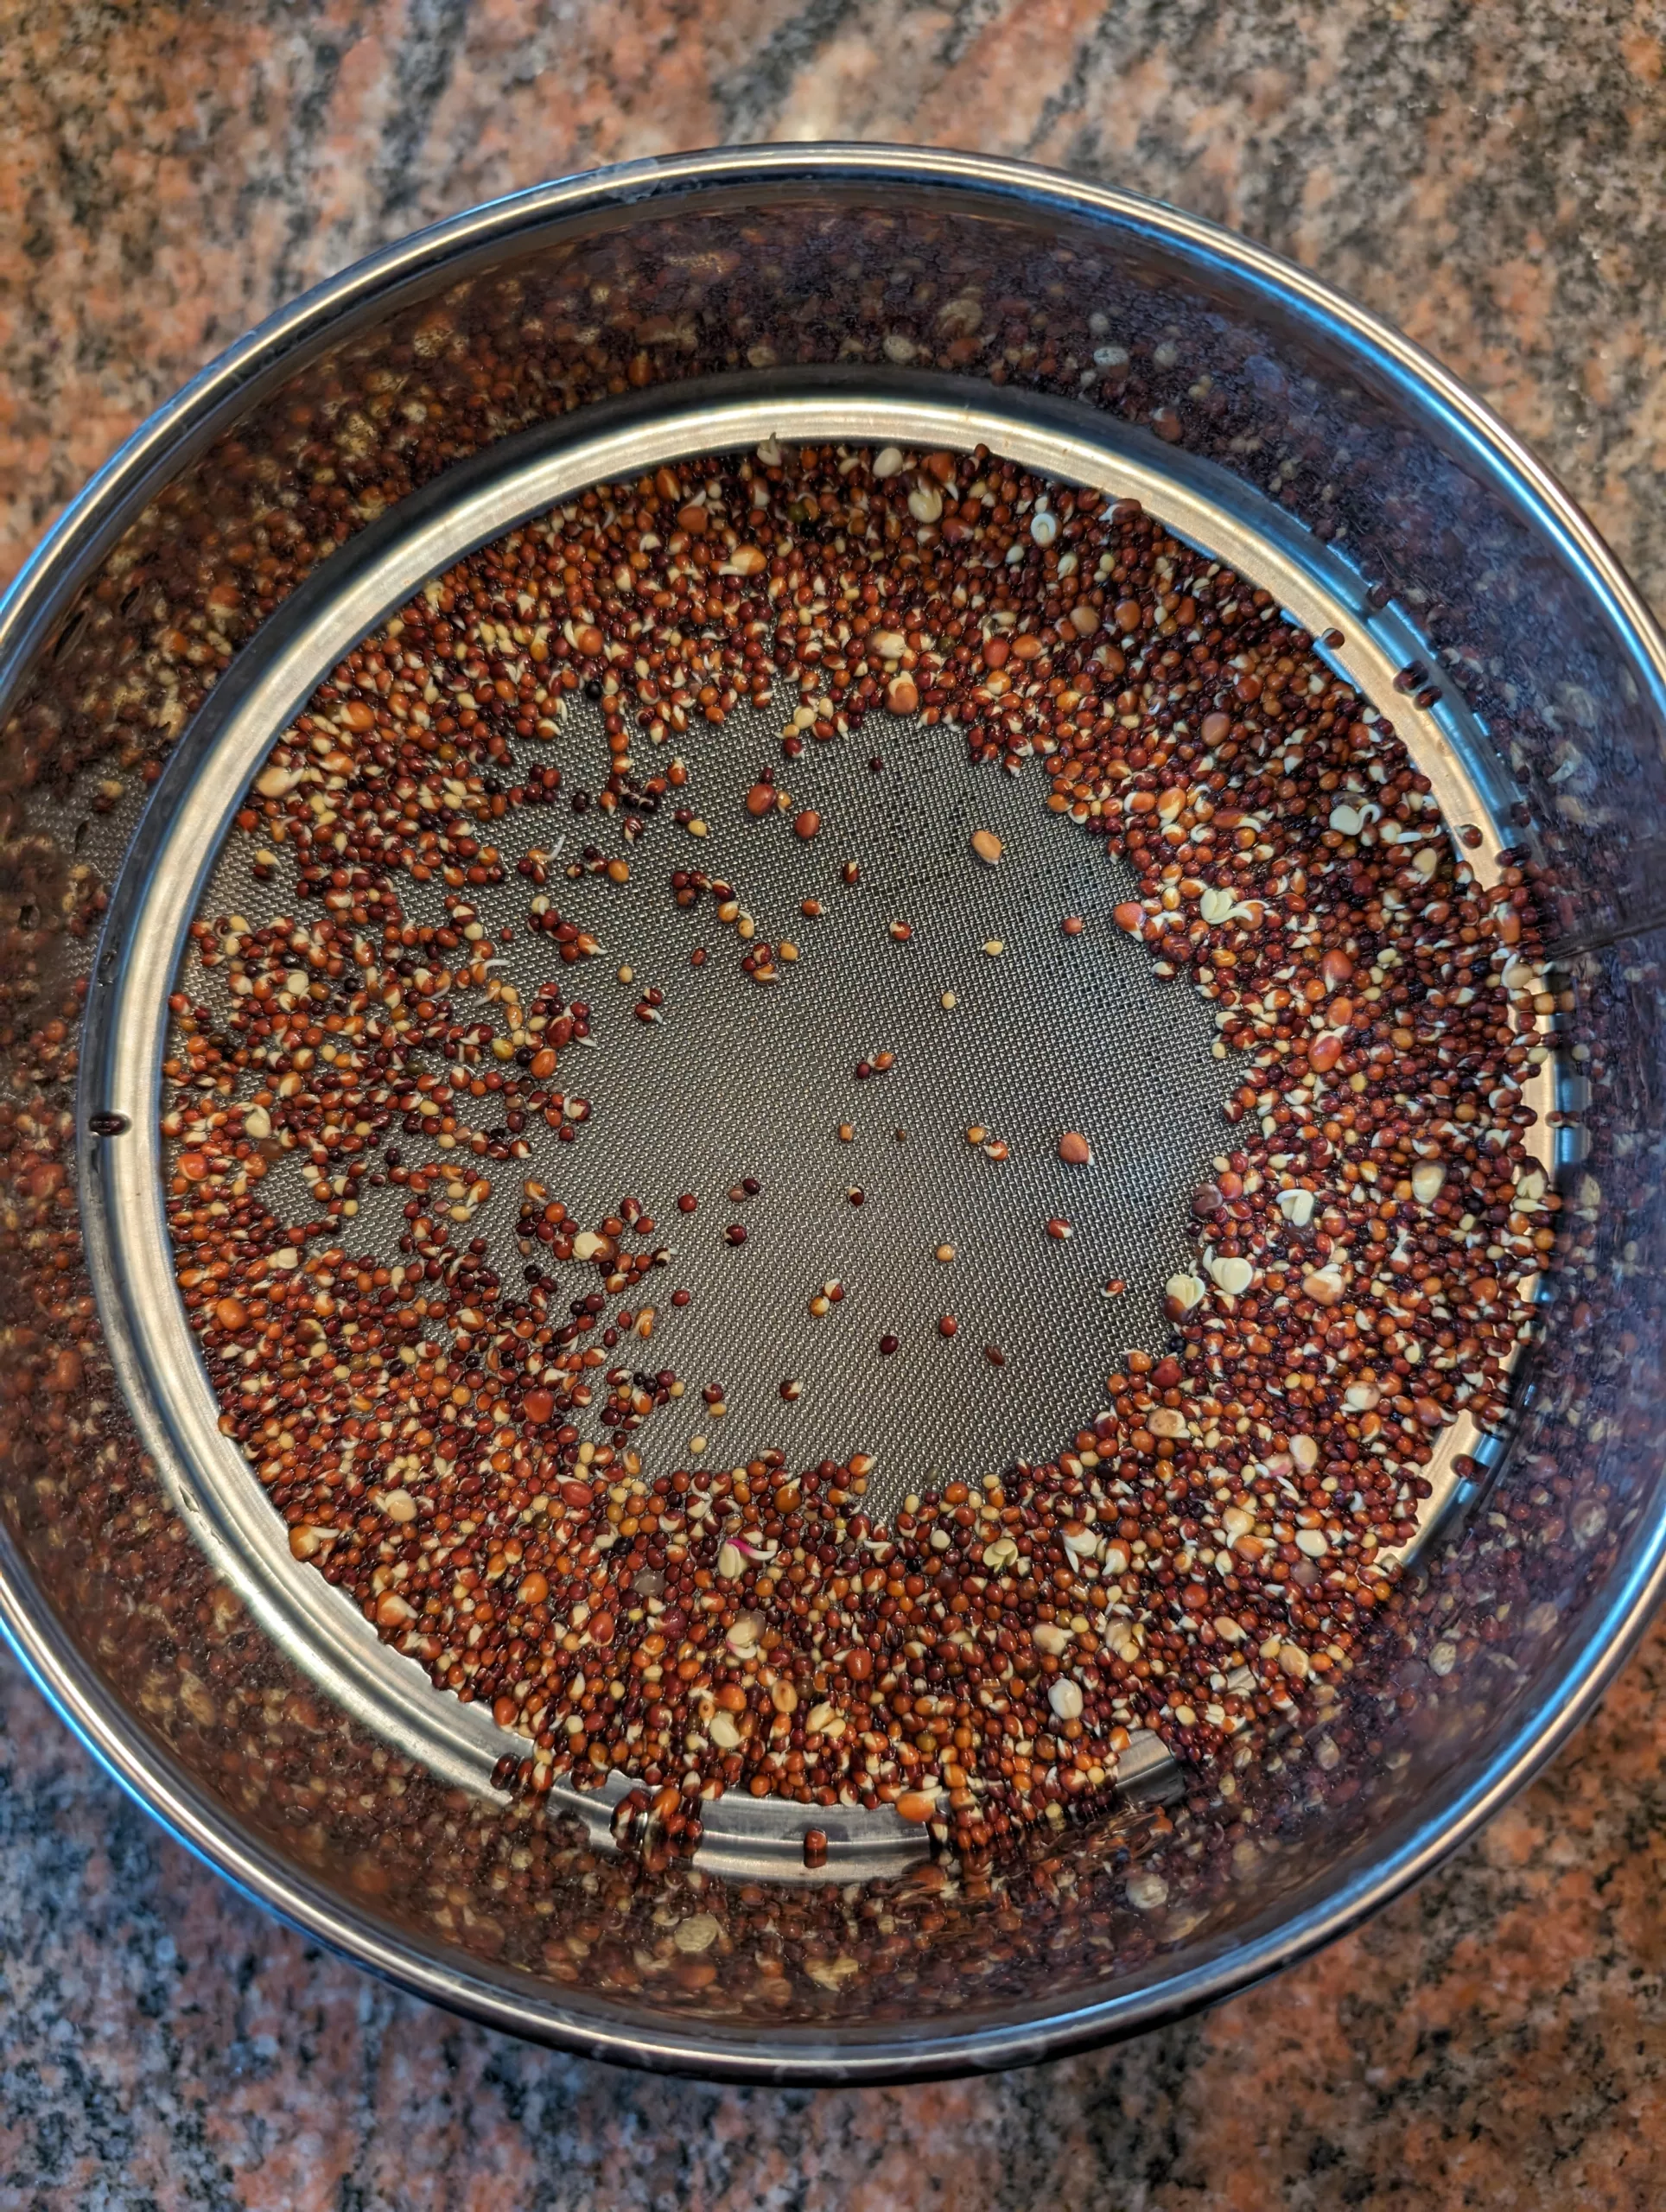
    Growing Medium

    For sprouts, you just need a container that allows you to store your seeds in a way that you can rinse them a few times a day and then let the water drain from the seeds.  Microgreens require a ‘medium’ to grow in.  This medium can be soil, but I like to use hemp or felt pads in a hydroponic environment.  The purpose of this medium is to supply additional nutrients to the plants so that they can grow beyond the ‘sprout’ stage.

    Light Requirements

    Sprouts don’t really require any light.  I tend to finish mine for a few days with indirect light just to make them look nicer.  This can be as simple as leaving them uncovered on a kitchen counter.  Because microgreens are grown into small versions of their typical plant size, a bit more light is required.  This is one of the reasons for the difference in nutritional aspects between sprouts and microgreens of the same plant variety.  Microgreens are undergoing more photosynthesis.  This combined with the added nutrients in the growing medium changes the nutritional profile of the microgreen.

    Time to Harvest

    Sprouts are ready to harvest in a few days.  Once the seed is broken open and a stem and root system are beginning, you can harvest at any time.  Microgreens take a week or more.  With microgreens you want to wait to harvest until the first ‘real’ sets of leaves appear.  When harvesting, you want to eat the entire sprout, stem, root, etc.  You want to discard everything in the growing medium with microgreens and only eat the actual stem/greens.

    The Sprouts vs. Microgreens Winner

    So who is the winner of Sprouts Vs. Microgreens?  For me, it’s sprouts.  I like the quick turn around time and the overall simplicity.  I also like the versatility of being able to add them to almost anything.  Many others are scared away from sprouts because of the chance that the growing environment can be a breeding ground for bacteria and mold.  If this is you, I have a few recommendations:

    1. Always rinse with cold water.  Not using warm/hot water helps keep the environment good for sprouts and bad for the nasties.
    2. Make sure your seeds are adequately spaced and drain properly in between waterings.
    3. Buy seeds from a reputable place.  Starting with high quality seeds that aren’t already contaminated is a great idea.
    4. Visually inspect the environment before each watering.  A quick check for mold or bacterial growth before each watering will allow you to abandon your sprouts the moment you know something is wrong.  Just don’t confuse some ‘fuzziness’ of the early roots for mold 😁
    5. If you don’t feel confident doing these things… Grow Microgreens instead!
  • Improving NAD Levels

    Improving NAD Levels

    If you have spent any time in longevity circles or reading about health recently, you have likely come across mention of NAD.  What is NAD and why is everyone so focused on it as a means for improving healthspan?  I’ll dig into this and discuss ways of improving NAD levels.  I’ll also discuss what I currently do after all of the research I’ve conducted on myself.

    What is NAD?

    NAD is Nicotinamide adenine dinucleotide.  It is a coenzyme that is found in all cells and involved in many processes within those cells.  It exists in two forms: the oxidized (NAD+) and reduced (NADH).  These forms contribute to cellular metabolic processes by either donating or gaining electrons.

    Why is NAD important?

    When we are discussing NAD’s role in maintaining healthspan, there are three main areas of focus that are often discussed:

    Improving NAD Levels

    NAD declines with age.  There have been several studies that correlated almost all of the diseases of aging with lowered levels of NAD.  Due to this, there is a lot of interest in improving NAD levels as we age.  Here are a few ways to do so.

    Increasing NAD+ with Its Precursors

    NAD is constantly being broken down and resynthesized in the body.  One approach to improving NAD levels has been to supplement with NAD precursors.  The theory here is that these substances will eventually be turned into NAD by the body.  There are many precursors that will do this.  The two most popular are nicotinamide mononucleotide (NMN) and nicotinamide riboside (NR).  There have been conflicting reports regarding the effectiveness of this.  Some claim that they are broken down to simpler compounds before crossing into the bloodstream.

    Lifestyle Changes

    There are many lifestyle choices that are responsible for improving NAD levels.  It’s great that many of these are ‘no brainers’ in terms of their other impacts on healthspan.  The most common lifestyle changes for improving NAD levels include:

    • Exercise – This continues to be the king for improving healthspan across the board.
    • Circadian Rhythm alignment – fix your sleep and fix everything including your NAD levels.
    • Caloric Restriction/Eating Habits – restricting your calories will increase your NAD levels.  A high fat and/or sugar diet will cause an imbalance in the NAD+/NADH ratio leading to downstream issues with NAD+.  Certain foods/supplements can be used to inhibit NAD+ consumers that may not be optimal given your situation.
    • Hot/Cold Shock – Using a sauna or cold plunge can raise NAD levels.  The mechanism is different with hot vs cold, but the outcome will be similar.
    • Limiting Alcohol Consumption – Alcohol consumption increases the ratio of NADH to NAD+.   When the ratio is skewed in this way, NAD+’s capacity to activate sirtuins is impeded.

    What Do I Do to Improve My NAD Levels?

    So given the existing studies, what do I do to improve my NAD Levels? Obviously, I exercise, try to eat healthy, follow time restricted feeding and value Circadian alignment.  If you’ve been reading my posts, you likely know I’m a fan of Hot/Cold environmental stress as well.  You might also know my views on limiting alcohol consumption as well.

    Precursors

    For a long time, I relied on the precursor supplements.  Initially I focused on NR but then switched to NMN.  I took a supplement containing several precursors, sirtuin activators and other B vitamins as part of a clinical trial.  This is where I was introduced to a mechanism for measuring NAD levels.  This product worked for me but was fairly expensive.  I have since been able to get similar results by following my current approach.

    I still occasionally supplement with NMN, but  recent studies that show potential for upregulating cancer growth have convinced me to dial that back.  Instead, my supplementation focus is now mainly in two separate areas.  Focus on optimizing the NAD+/NADH ratio and the NAD salvage pathway.

    Salvage Pathway

    The best way to generate NAD via the salvage pathway is to provide the precursors tryptophan, niacin and niacinamide.  I regularly supplement with essential amino acids which provides plenty of tryptophan.  I’ve written about how I use niacin as part of my sauna protocol.  On top of this, I take 50mg of niacinamide in water first thing in the morning and last thing before I go to bed.

    Optimizing NAD Ratio

    I feel that focusing on optimizing the salvage pathway already helps with maintaining the NAD+/NADH ratio, but I do one additional thing regarding this.  I take supplements to inhibit CD38.  Right now, I’ve been using apigenin and quercetin to do this.

    So what are your thoughts on NAD?  Are you doing anything to optimize your levels?  Let me know in the comments.

  • Bodyweight Workout Routine

    Bodyweight Workout Routine

    I’ve tried many workouts over the years.  Cardio, weightlifting, calisthenics, only playing sports, it’s always been something that kind of annoyed me.  Some would work… others, only for a time and then a plateau would reach and no more gains could be made.  Eventually, I settled on a bodyweight workout routine that I’ve been able to progress that continues to work for me.  Read on if you’re interested in learning more about why I choose and how I perform my bodyweight workout routine.

    Why a Bodyweight Workout Routine?

    So why a “bodyweight workout routine”?  After trying just about everything, I’ve concluded that the best workout for me must include the following:

    • require minimal equipment; I travel a good bit and don’t want lack of access to specialized equipment to make it easy for me to skip a workout.
    • a way to do a full body workout in a minimal amount of time
    • maximize a full range of natural motion to minimize injuries
    • prioritize building muscle without a complicated means of altering the routine when hitting plateaus.
    • emphasize Functional Strength training

    The Exercises

    The Bodyweight Workout Routine that I follow focuses on a few core exercises.  These are arranged in such a way as to hit most of the major muscle groups with the fewest number of exercises.

    Push

    The push exercises I use are mostly pushup variants.  I alternate with dips especially when my pushups have not been progressing in order to change things up.

    Pull

    My pull exercises include pull ups, chin ups and inverted rows.  I also incorporate my ‘pull’ muscles in some of my core exercises.

    Legs

    I exercise my legs with air squats and walking lunges.  Even though I do these with a weighted vest, I’ve been working on being able to do proper single leg squats to progress further.  I do these assisted or alternate with shrimp squats at this point in time.

    Core

    I try to incorporate core exercises in everything I do.  This occurs by always being mindful of the ‘Hollow Body Hold‘.  In addition to this, I incorporate planks, V-Ups and hanging knee raises.  Hanging Knee raises also hit my pull muscles at the same time.

    Cardio

    My cardio is mostly walking and hiking/rucking.  I do sprints one day a week.  On my active recovery days, I do at least one High Intensity Interval Training (HIIT) session focused on the ‘Nitric Oxide Dump‘.  When I refer to ‘light cardio’, it’s either unweighted walking or rebounding.

    Mobility

    For mobility, I use both Yoga and the 5 Tibetan Rites.  If I’m stuck on a progression and I think it’s due to a mobility issue, I’ll often factor in something that I’ve learned from more in depth calisthenics programs.  This is the area where my routine changes the most frequently.

    Useful Equipment

    My core routine consists of bodyweight exercises that I can do anywhere.  This being said, there are certain pieces of equipment that make things easier when I am home.  Most of this equipment is focused on making the movements safer or allow me to increase the difficulty.  The equipment that I find useful (and alternatives if you don’t have them) include:

    • A Multi-Grip Pull-Up Bar – This is probably the most important piece of equipment.  Without it, you’ll need to find a branch or other outcropping to do your ‘pull’ exercises on.  Most of these alternatives won’t give you the variance in how you can pull yourself up (and you’ll probably want a pair of gloves to protect your hands🤣).
    • Wooden Gymnastic Rings – I prefer to use gymnastic Rings for my ‘rowing’ exercises.  You can also use them for progressing and varying your ‘push’ exercises.  Without rings, a Dip Station also works.  Without either of these options you can use a properly weighted table or two chairs.
    • An Extra Thick Yoga/Pilates Mat – This is especially useful for ‘core’ exercises but it’s pretty much required if you’re going to also incorporate Yoga.  It also helps with progressing single leg exercises like shrimp squats.
    • A means of making exercises more difficult with resistance and/or added weight – My favorite things in this area is to start out with a weighted vest and adjustable ankle weights.  To really build muscle, you’ll want to add an Adjustable Dumbbell and Barbell Set.  To make the most out of loading your full range of motion, nothing beats a Stackable Resistance Bands Set.
    • A High Density Foam Roller – Eventually, you’re going to go a bit too hard and need some help with recovery.  A foam roller is a good first place to start for this.

    Progressing Your Bodyweight Workout Routine

    Since I want to avoid injury and being constantly fatigued, I target rep ranges for each of these exercises in the high hypertrophy/endurance range.  My last strength day of the week is meant for attempting to break personal records.  More about all this below when I discuss my day to day routine.  Before deciding your own structure, you need to set a baseline for each of the main exercises.  If you can do 15 – 20 reps max for each one, that’s a great place to start.  If not, you’ll need to find an easier version of the exercise where you can do 15 – 20 clean reps and progress from there.  I use this basic guide to push progressions and have helped people do pull ups with this pull progression guide.  There’s no shame in doing these easier versions, it’s the only way that you’ll progress to the more difficult ones.  If you find yourself plateauing with one progression but still unable to move to the next one with the proper rep range there are a few additional things you can do.  

    • Add more reps to the progression that you can do cleanly
    • Add some more weight to your current progression
    • Add resistance bands to the progression you’re trying to move to in an ‘assistive’ fashion
    • Sometimes, bouncing down to a lower progression with far more reps is necessary in order to correct form issues that you have that are preventing you from using the muscles necessary to progress

    I recently started using blood flow restriction (BFR) training with lighter weights to get more from my workouts.

    My Bodyweight Workout Routine Structure

    Now I’ll describe what I do each day of the week.  If something comes up, I’ll shuffle days if necessary, but I avoid having three of the same ‘types’ of days in a row.

    Every Day

    There are a few things that I strive to do every day.

    • Start every morning with the 5 Tibetan Rites.  This really gives me a burst of energy to start my day.  I’ve also been incorporating Pigeon Pose into this routine recently.
    • Walk a minimum of 11000 steps.  I do the bulk of this during three periods.  The first is after I’m done consuming my caffeine for the day.  The other two times is right after my meals for a bare minimum of 15 minutes.  I try to walk outside whenever possible.
    • Incorporate Non-exercise activity thermogenesis (NEAT);  I try to get as much ‘exercise’ that doesn’t look like exercise into my day as possible.  I’ll walk when I can drive, park at a distance, climb stairs, etc.
    • Bring glucose transporter type 4 to the surface of muscle cells before eating.  This is a ‘trick’ that I picked up from Tim Ferriss’ book The 4 Hour Body.  I mostly use air or isometric squats for this, but have played around with all the techniques that he mentions. 

    Day 1

    • Warm up with 5 min of light cardio
    • 3 sets of straight pushups 70% of your maximum number of reps
    • 3 sets of rows 70% of your maximum number of reps
    • 2 sets of walking lunges 50 reps
    • 2 sets of hanging knee raises 15 reps (each side)
    • 2 sets of V-Ups 15 reps

    Day 2

    This is an endurance/recovery focused day.

    I do one HIIT session (often with BFR) for about 10 minutes

    I do an additional workout after recovered that consists of:

    I’ll do a short Yoga session on this day as well.

    Day 3

    • Warm up with 5 min of light cardio
    • 3 sets of most advanced pushup progression 75% of your maximum number of reps
    • 3 sets of most advanced rowing progression 75% of your maximum number of reps
    • 2 sets of chin-ups 75% of your maximum number of reps
    • 2 sets of walking lunges 50 reps
    • 2 sets of hanging knee raises 15 reps (each side)
    • plank for maximum hold time

    Day 4

    This is an Active Recovery day.  I do one HIIT session (often with BFR) for about 10 minutes.  Otherwise I focus on longer walks and/or rucks.  I’ll often do a short Yoga session as well.

    Day 5

    This is the day for setting new records.  Getting 90% of your maximum reps is the minimum. What we really want to do here is move to a more advanced progression or add clean reps to the maximum that we can do in our current progression.  We then use this to reevaluate our plan for the next week.

    • Warm up with 5 min of light cardio
    • 1 set of pullups to 90% of your maximum
    • 1 set of most advanced pushups to 90% of your maximum
    • 2 sets of straight pushups 70% of your maximum number of reps
    • 2 sets of rows 70% of your maximum number of reps
    • 2 sets of walking lunges 50 reps
    • 2 sets of hanging knee raises 15 reps (each side)
    • 2 sets of V-Ups 20 reps

    Day 6

    • Warm up with 5 min of light cardio
    • 5 sets of sprinting as fast as you can for 100 meters with no more than 2 minutes rest between sets

    Otherwise, this is an Active Recovery day.  Focus on longer walks and/or rucks.  Do a short HIIT session if recovery for the week has been good.  Do some Yoga otherwise.

    Day 7

    Active Recovery

    Longer hikes and/or rucks
    • Yoga and mobility exercises

  • Intro to Breathwork

    Breathing… we all do it.  Most of us probably don’t pay much attention to how we go about it either.  Unless you do, you probably also don’t realize that some subtle awareness when it comes to your breathwork practice can likely make a radical difference in your day to day health.  I was the same way, until I started researching the subject.  After years of doing so, I slowly incorporated some simple techniques that have changed my mind considerably.  If this is of interest to you, read on for my intro to breathwork.

    My Intro to Breathwork Journey

    I’ve had an on again/off again relationship with meditation and yoga my whole life.  Long time practitioners of both always talk extensively about “paying attention to the breath”.  Early on, I never really put much stock into this.  I associated this with the more ‘woo’ side of the practice without any real scientific basis.  My opinion of this started to change after looking for effective ways of reducing my stress while working in a high strung corporate environment.  My first success in using breathwork for this came from a Navy SEAL friend of mine.  He introduced me to Box Breathing (described below) and subjectively, this seemed to allow me to more easily fall asleep on high stress evenings.

    Eventually, as part of that same high strung corporate environment, I often traveled to India.  On the weekends while I was there, I would travel the country with my co workers and take in many of the experiences associated with traveling to India.  This often involved going to Ayurvedic retreats and temples throughout the country, participating in yogic and meditative rituals.  This exposed me to Pranayama.  This practice defines several different techniques for breathing that are meant to induce different types of changes in the body.  At this point, the focus on breathwork while meditating and doing yoga started to make much more sense.

    I was exposed to all of this before I started using the Oura ring.  With the first generation of Oura, it was easy to see the impact of box breathing on my sleep.  The moment that Oura rolled out it’s mediation support, I started to use it with different dedicated breathing techniques.  It was honestly surprising to see how effective some of them were in terms of impacting heart rate and HRV.

    Scientific Basis

    When I started to really dig into this, I came across numerous studies that laid the groundwork for a very scientific basis for many breathwork practices.  Breathing is actually more about regulating Carbon Dioxide (CO2) than oxygenating the blood.  We strive to maintain our CO2 levels in the blood within a very narrow range.  The brain interprets a low oxygen state as a threat and it activates the sympathetic nervous system as a result.  CO2 is also acidic, so the CO2/oxygen balance has direct effects on the blood’s pH.  Taking steps to rebalance these levels does the opposite and results in an overall calming effect.

    In addition to the effects related to blood oxygenation, more research has shown that diaphragmatic breathing (slow abdominal based breathing) directly stimulates the vagus nerve.  This instantly puts you into a more parasympathetic state.  Vagus nerve stimulation has also been tied to improvements in Heart Rate Variability (HRV).  Additionally, heart rate is directly tied to breathing.  This phenomenon is referred to as Respiratory Sinus Arrhythmia (RSA) and directly impacts blood pressure.

    Understanding these basic concepts is the key to using controlled breathwork to achieve different desired states.  Hear are a few things to keep in mind:

    • Slow breathing, especially from the diaphragm stimulates the parasympathetic nervous system and tends to be more relaxing.
    • Fast breathing and chest breathing tends to increase CO2 levels resulting in a sympathetic nervous system response.  This can energize, but also promotes anxiety.
    • Breath Holds increase C02 levels
    • Emphasizing inhales increases heart rate (and often blood pressure)
    • Emphasizing exhales decreases heart rate (and often blood pressure)

    Proper Breathing Technique

    Many people underestimate the importance of breathing ‘correctly’. The hurried modern life and other stressors have an extremely negative impact on how people breathe and most don’t even realize it. If you don’t currently have awareness regarding how you breathe on a regular basis and aren’t prioritizing doing something about it, you will be amazed at how quickly doing so can change the way you feel. There are many breathing techniques that you can use to address many different goals that you may have, but most modern americans are stuck in a continuous stress state. Even moving into a ‘rest and digest’ state a few times a day can have a profound positive impact on your health.

    Based on the information presented so far, the ideal every day breathing technique would seem to be a reasonably slow, diaphragmatic breath.  I’ll add one more rule of thumb that should be followed: breath through the nose.  Not only does breathing through the nose help filter out pollutants, virii, etc.  It helps warm cold air before it hits the lungs.  Additionally, it’s important in order to effectively get nitric oxide into our systems.  Take a look around you and see how many people are actually breathing this way.  Even though, this will generally be the best way to breath, different types of breathwork are designed to achieve certain temporary responses.

    Types of Breathwork

    There are many types of breathwork and I’m always learning more.  This list below are the ones that I actively use.  I briefly explain how to do the technique and why I personally do them.

    Box Breathing

    This was the type of breathwork that started it all for me.  I started doing it as a way to immediately calm myself but I’ve since found that it’s also very effective for getting into a state of focus.  It’s super effective even after doing it for a few minutes and it’s very easy for beginners to learn.  Box breathing starts by expelling all air from your lungs.  Stay in this ’empty’ state for a count of 4.  Now inhale through your nose for a count of four.  Hold for a count of four.  Finally, exhale through your nose again for a count of 4.  This is one cycle of Box Breathing.  Repeat for 2 to 5 minutes and enjoy your state of calm focus!

    4-7-8 Breathing

    My success with Box Breathing lead me to discover 4-7-8 Breathing.  Box Breathing before bed, sometimes had the unfortunate side affect of making me more focused on things that I needed to do tomorrow, etc.  This wasn’t helping me get the sleep that had initially hoped this breathwork practice would provide. This breathwork technique is a form of diaphragmatic breathing that involves inhaling for four seconds, holding the breath for seven seconds, and exhaling for eight seconds.  The longer breath hold combined with the longer exhale is what makes this an even more relaxing technique compared to Box Breathing.  Again, repeating this for a few minutes is all that is needed to achieve a dramatically more relaxed state.

    Physiological Sigh

    The physiological sigh is the easiest way to instantly remove anxiety.  It’s also super easy to do.  Just two rapid inhales through the nose and then an extended exhale through the mouth.  One of these works wonders, but do this a few times to really feel the impact.

    Nadi Shodhana

    Nadi Shodhana (also known as alternate nostril breathing) is a great centering practice and one that I often do while meditating in the sauna.  It can be relaxing and it also increases focus.  Studies have shown that left nostril breathing slows down heart rate and decreases blood pressure. These same studies indicate that right nostril breathing increases both heart rate and blood pressure.  Pranayama’s practice of Nadi Shodhana incorporates asanas and the Vishnu Mudra, but it can be done by just simply doing the following:

    • Use the thumb on your right hand to block your right nostril and inhale through your left nostril
    • Close your left nostril with your index finger and briefly hold
    • Open your right nostril and exhale slowly and then immediately inhale
    • Close your right nostril again and briefly hold
    • Open your left nostril and exhale slowly

    This is one cycle.  From this point you can repeat many times.  You can also add holds on exhale or combine this technique with Box Breathing for added effects.

    Kapalabhati Breathing

    Kapalabhati is another classic Pranayama.  It is also known as “Skull Shining Breath”.  This is considered a purifying breathwork technique.  It involves alternating active, explosive diaphragmatic exhales with a longer passive inhale.  This is an energizing technique, so not something you would want to do when you’re trying to relax/go to sleep.  I use this as a form of Respiratory Muscle Training (RMT) that doesn’t require a device.  RMT has been shown to increase cardio athletic performance and VO2 max.  Be careful with this!  It’s common that new practitioners are in pain the next day because they are using muscles that they are not used to using.

    Wim Hof Method

    While the full Wim Hof Method also incorporates meditation and cold exposure as core tenants, the breathing method is also very effective when used alone.  This technique is closely related to Holotropic breathwork.  It is basically a form of controlled hyperventilation.  Hyperventilation has been shown to slow down the default mode network.  This form of breathing is extremely powerful and I use it as a general ‘reset’.  In my experience, I feel an extended state of bliss for days after practicing this.  When properly done, this technique really shows the range of what you can accomplish with breathwork.

    Conclusion

    There are so many different types of breathwork!  These are a few that I use all the time.  I wish I had familiarity with these longer than I have.  I feel strongly that some of these basic techniques should be taught early in schools and/or be added to every parents’ tool box.  It could really make a huge difference in the mental health of our children to have an effective means of reducing stress/anxiety that they can carry with them wherever they go.  Are you a breathwork advocate?  Are you using a technique that I haven’t covered here?  Let me know in the comments!

  • Joovv Review

    Joovv Review

    The Joovv is the gold standard when it comes to red light therapy devices. It’s a medical grade, modular system that allows you to build the ideal red light therapy setup for your needs over time. It supports both red and near infrared wavelengths and allows you to control them independently. The EMF levels emitted by the device are also third party verified to be within an acceptable range.  So I jumped at the opportunity to participate in a study that provided a Joovv to use in my own home.  Read on for my Joovv review.

    The Study

    The study that I participated in was designed to investigate the impact of using the Joovv device to treat Seasonal Affective Disorder (SAD). I followed the protocol exactly as specified during the study… 10 minutes of red light and near infrared exposure to the face every morning. The light emitted is a bit strong for me to keep my eyes open while staring into the device.  I took this as an opportunity to get in an extra 10 minutes of meditation each day. 

    Impact on Mood

    After a few days, I noticed a definite improvement in my mood. The extra morning mediation alone could have been the cause. After reading about the benefits of getting red light into the eyes, I decided to do the PBM therapy with eyes open.  In both cases I noticed a difference in mood although it’s difficult to say if both are additive.

    Impact on Sleep

    By the end of the first week, my sleep quality was obviously improved, even though my overall length of sleep remained unchanged. Not only did I feel more refreshed, but this was also quantitatively verified by the data from my Oura ring. I continue to follow this protocol even though the study has ended since it is obvious that this 10 minute morning ritual has a very pronounced positive impact on my sleep and overall mood.

    Impact on Body Comp

    After the study ended, I started experimenting with some other uses for the Joovv.  During the course of this study, I was spending way more time than I wanted to working out.  Despite this, I seemed to plateau in terms of increasing/maintaining my lean muscle mass while decreasing my overall body fat percentage. Working out more or harder wasn’t really an option for me as I was getting into a situation where timely recovery was becoming problematic.  To be honest, I didn’t really want to dedicate a larger portion of my day to working out.

    Initially I started using the Joovv to try to enhance muscle and joint recovery.  This was before I purchased an infrared sauna (which honestly is better for this).  Since I didn’t have a ‘full body’ red light therapy setup, I was spending a ton of time spot targeting pain areas. This wasn’t sustainable with everything else that I had going on so I started investigating other ways to achieve my goals.  How could I increase lean muscle mass and decrease body fat while working out less and/or at a lower intensity?

    This led down a crazy rabbit hole of many things to try.  Ultimately it had me circle back around to the libido boosting PBM advocates. At this time, I’m still experimenting but I added a second daily Joovv session aimed at boosting testosterone levels.  This with some additional diet/supplement tweaks has allowed me to decrease both the frequency and intensity of my workouts and resulted in a 2% increase in overall lean muscle mass and a ~3% decrease in body fat. I have plans in the pipeline to test out all the variables and see how much of this change can be attributed to the Joovv session.

    Conclusion

    I have and use several different red light therapy devices.  The Joovv mini isn’t the best for everything, but it’s very effective in many cases.  I use the Joovv panel almost every day for something.  Have you been using a Joovv or other device for PBM? Do you have questions specifically about the Joovv? Let me know in the comments or each out via email.