Category: Gardening

  • Building a Backyard Food Forest

    Building a Backyard Food Forest

    I’ve written before about my desire to turn my backyard into a food forest using edible landscaping. I’ve always imagined a lush, thriving garden that requires minimal effort yet provides a bounty of products—all while resembling a natural forest ecosystem. My process of building a backyard food forest started after encountering the concept of permaculture. Rooted in ecological principles, permaculture is a holistic approach to creating sustainable systems that mimic nature’s patterns. Unlike traditional gardens, it’s designed to work with nature, reducing labor and water needs over time.


    What Is Permaculture?

    Coined in the 1970s by Bill Mollison and David Holmgren, permaculture combines the words permanent and agriculture (or culture). It’s a design philosophy focused on creating resilient, self-sustaining ecosystems that benefit both humans and the planet. Unlike conventional gardening or farming, permaculture emphasizes:

    • Working with nature, not against it.
    • Creating no waste—everything has a purpose.
    • Building soil health as the foundation of all life.
    • Ethical stewardship of resources for future generations.

    In the Mid-Atlantic region, where seasons shift from humid summers to crisp winters, permaculture offers practical solutions to thrive in harmony with local climate, soil, and wildlife.


    Core Principles of Permaculture

    Before diving into how I’ve put things into practice, let’s explore three foundational principles:

    1. Observe and Interact: Study your land’s microclimates, water flow, and sunlight patterns. Factor this information into your design plans for making the most of your unique situation.
    2. Catch and Store Energy: Harvest rainwater, sunlight, and organic matter to reduce reliance on external resources.
    3. Produce No Waste: Compost scraps, recycle materials, and design systems where one element’s “waste” becomes another’s resource.

    Key Permaculture Practices

    There are some key practices that you must ultimately master in order to make the most of permaculture. The specifics of these will vary wildly based on the region of the world you are in. This is why observation is the first step to build your backyard food forest.

    Companion Planting

    Pair plants that support each other’s growth. Practices like three sisters gardening (corn, beans, and squash) thrive for a reason, as beans fix nitrogen, corn provides structure, and squash shades the soil. One of my favorite books on companion planting is Carrots Love Tomatoes

    Integrate Native Plants

    Start with plants that are native to your area. These are already adapted to the specifics of your climate and will support local pollinators. This can help minimize the need to heavily amend your soil and manually water everything.

    Rainwater Harvesting

    Take advantage of any water that falls on your property. Install barrels, swales, or ponds to store water for dry spells. Use this as the basis for any watering system you develop.

    Leverage Perennials

    Replace annual crops that you need to plant every year with perennial plants that yield food for years. Blueberries, asparagus, garlic, hazelnuts, and fruit trees like pawpaws are Mid-Atlantic favorites.

    Master Mulching

    Rebuild soil health by layering cardboard, compost, and mulch. This mimics natural leaf litter, suppressing weeds and enriching soil. Perfect for reclaiming lawns or garden beds.

    Natural Pest Management

    Encourage biodiversity to control pests. Ladybugs, birds, and even chickens can keep aphids and slugs in check. Avoid synthetic pesticides that harm beneficial insects.


    Starting Your Mid-Atlantic Permaculture Journey

    Start Small

    Many newcomers to permaculture are immediately overwhelmed. Building a backyard food forest is a marathon, not a sprint. Do small things to help learn your land while still giving you some ‘rewards’. Begin with a balcony herb garden or a rain barrel. You’re experimenting with ideas at this point.

    Learn Local

    Read about the core principles, specifically things that are targeted at the region that you live. Befriend a long time gardener. Attend workshops or join groups. A good resource for the Mid-Atlantic is the Shenandoah Permaculture Institute.

    Assess Your Site

    Now that you’re armed with some basic knowledge and have some skin in the game with a small garden plot, start in earnest by observing your space:

    • Sunlight: Note how sunlight moves across your yard throughout the day. Most fruit trees and shrubs need 6–8 hours of sun, while shade-tolerant plants (e.g., leafy greens) can thrive in partial shade.
    • Soil: Test soil pH and fertility. Identify areas with poor soil that you may need to amend with compost or mulch.
    • Water: Identify natural water flow and areas prone to pooling.
    • Space: Sketch your yard’s dimensions and existing features (trees, structures) to assist in planning layers effectively.

    Identify Plants

    A forest has distinct layers—replicate them with edible or useful species that are of interest to you. Avoid invasive species for your area and instead, prioritize native or climate-adapted species—they require less water and resist local pests.

    1. Canopy Layer: Tall fruit or nut trees (e.g., apple, pear, chestnut, or persimmon). Space them to allow sunlight to reach lower layers.
    2. Understory Layer: Dwarf fruit trees or berry bushes (e.g., blueberries, currants, or hazelnuts).
    3. Shrub Layer: Edible flowers, herbs, or smaller shrubs (e.g., rosemary, elderberry, or serviceberry).
    4. Herbaceous Layer: Perennial vegetables and herbs (e.g., rhubarb, sorrel, chamomile, or comfrey).
    5. Ground Cover: Low-growing plants that suppress weeds and retain moisture (e.g., clover, strawberries, or thyme).
    6. Root Layer: Tubers or bulbs (e.g., Jerusalem artichokes, garlic, or onions) to maximize vertical space.

    Design the Layout

    • Sunlight Flow: Place taller plants (canopy) on the north or east side to avoid shading smaller species.
    • Companion Planting: Pair plants that benefit each other. For example, nitrogen-fixing legumes (clover) enrich soil for fruit trees, while marigolds deter pests.
    • Biodiversity: Mix species to prevent monoculture and attract pollinators (bees, butterflies) and pest predators (ladybugs, birds).

    Prepare the Soil

    • Mulch Heavily: Use wood chips, straw, or leaf litter to retain moisture, suppress weeds, and feed soil as they decompose. If you have access to lots of tree litter, consider creating Hügelkultur beds.
    • Add Compost: Layer compost over the soil to improve fertility and structure.
    • Avoid Tillage: Tilling disrupts soil ecosystems. Let fallen leaves and mulch act as natural mulch.

    Plant Strategically

    • Spacing: Allow room for mature plant sizes. Overcrowding leads to competition for light and nutrients.
    • Layer Planting: Start with canopy trees, then fill in understory and ground covers. Plant root crops first to avoid disturbing them later.
    • Seasonal Timing: Plant perennials in early spring or fall when they establish roots easily.

    Minimize Maintenance Practices

    • Mulch Annually: Replenish mulch to maintain soil health and reduce weeding.
    • Weed Sparingly: Pull weeds when young, but embrace some diversity—many “weeds” (like dandelions) are edible or otherwise beneficial.
    • Prune Selectively: Remove dead branches from trees but avoid over-pruning. Let fallen leaves and debris stay as natural mulch.
    • Water Sparingly: Once established, most perennials need little irrigation. Focus on young plants during dry spells.

    Integrate Wildlife

    • Pollinators: Plant flowers like lavender or echinacea to attract bees and butterflies.
    • Birds: Add a birdbath or nesting boxes to control pests like aphids. Many fans of permaculture will create mobile chicken coops to assist with this.
    • Compost: Compost kitchen scraps and any other woodland debris to recycle nutrients back into the soil.

    Harvest and Reevaluate

    • Pick Regularly: Harvest fruits and herbs to encourage growth and prevent waste.
    • Replace Slowly: If a plant dies or struggles, analyze potential reasons for this and replace it with another species suited to the space.

    Why Permaculture Matters

    Almost every region faces challenges like soil erosion, invasive species, and erratic weather. Permaculture helps address these by:

    • Building drought-resistant landscapes with deep-rooted plants.
    • Reducing stormwater runoff through swales and rain gardens.
    • Supporting pollinators critical to local agriculture.

    A food forest is a long-term investment that grows more resilient and productive with time. Permaculture isn’t about perfection—it’s about making steady progress. Every step brings you closer to a sustainable future. The Mid-Atlantic’s rich biodiversity and distinct seasons make it an ideal place to experiment with these timeless practices. By mimicking nature’s design, you’ll eventually create a low-effort, abundant ecosystem that nourishes both you and the planet.
  • Ode to the Paw Paw Tree

    Ode to the Paw Paw Tree

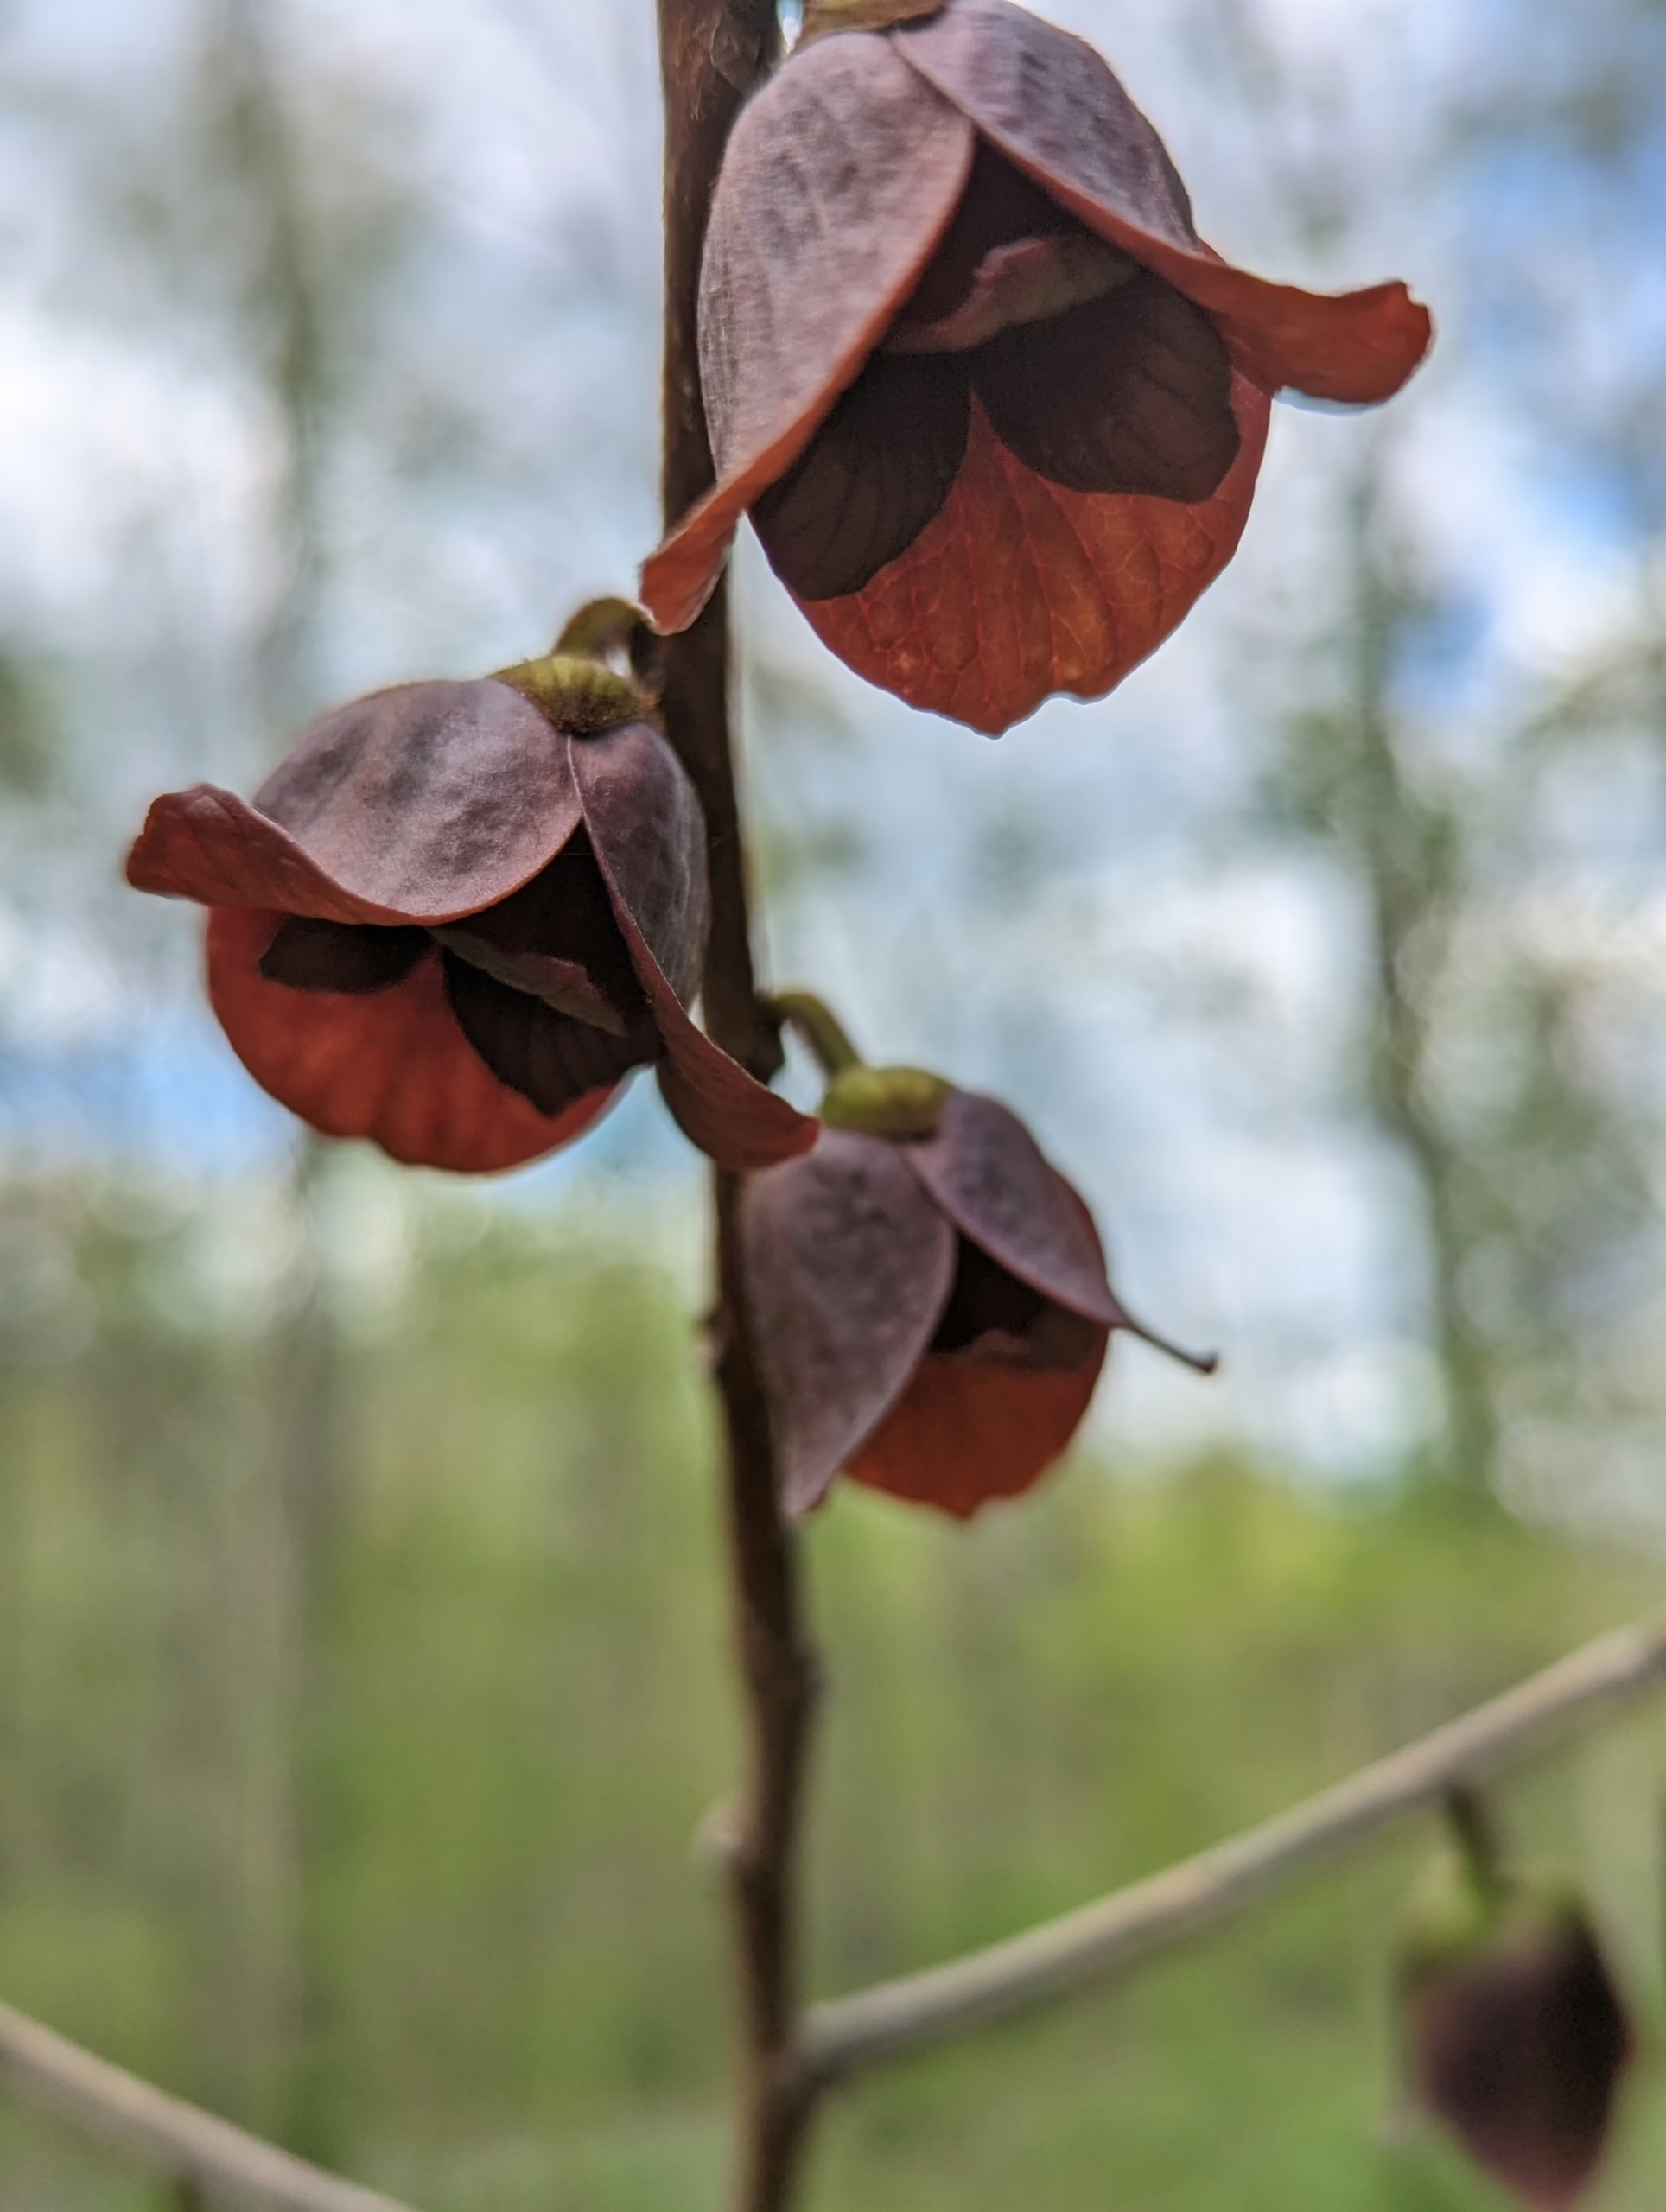
    As I wander through the lush forests and verdant valleys of northeastern America, I am often struck by the unassuming beauty of the paw paw tree (Asimina triloba). With its broad, drooping leaves and clusters of maroon flowers, this native species is often overlooked, yet it holds a profound significance in the history and culture of the United States. I aim to rekindle the appreciation for this forgotten fruit and explore why the paw paw tree is an integral part of our heritage.

    The Paw Paw Tree?

    The paw paw is a fruit bearing tree native to eastern North America. It is a member of the same flowering plant family that includes ‘soursops’. Paw Paw leaves and fruit are decidedly tropical in appearance. Due to this, the tree looks out of place in the understory of the forests where it is found. Paw Paws are the largest tree fruit native to the United States. The fruit has a soft, custard-like texture with a sweet, slightly tangy flavor.

    Historical and Cultural Significance

    The paw paw tree has been a silent witness to the unfolding of American history. Native American tribes prized the tree for its nutritious fruit, which was a staple in their diet. The tree was also revered for its medicinal properties. Early European settlers adopted the paw paw from the indigenous populations, incorporating it into their own cuisine and traditions.

    The paw paw tree has connections to some of America’s most influential figures. Thomas Jefferson, the third President of the United States, was known to have cultivated paw paw trees at Monticello, his beloved estate in Virginia. The tree’s presence in Jefferson’s gardens underscores its importance in the early American landscape. Moreover, the famous explorers Lewis and Clark encountered the paw paw during their historic journey across the continent, documenting its existence and touting its value as a food source.

    Ecological Importance

    Beyond its historical significance, the paw paw tree is also an ecological treasure. The tree’s broad leaves provide shade, creating a microclimate that supports a diverse range of plant and animal species. The fruit is an essential food source for various wildlife. By preserving and promoting the paw paw tree, we can help maintain the rich biodiversity of these ecosystems.

    Food Source

    The paw paw fruit (and ecosystem created by the tree) provides a food source for several types of wildlife, including:

    1. Mammals: Raccoons, opossums, foxes, and other mammals feed on the fruit, helping to disperse seeds and propagate new paw paw trees.
    2. Birds: Many bird species, such as the yellow-billed cuckoo and the tufted titmouse, consume the fruit, while others, like the wood thrush, eat the insects that inhabit the tree.
    3. Insects: The paw paw tree is a host plant for several insect species, including the zebra swallowtail butterfly, whose caterpillars feed exclusively on paw paw leaves.

    Ecosystem Engineering

    Paw paw trees contribute to the structure and diversity of their ecosystems through:

    1. Shade provision: The tree’s broad leaves create a shaded understory, which supports a range of shade-tolerant plant species and provides habitat for various animals.
    2. Soil stabilization: Paw paw trees have a deep root system, which helps to stabilize the soil and prevent erosion.
    3. Resiliency: Paw paw trees have very few insect pests and diseases. Due to substances in the leaves and bark, deer avoid them. This makes them an ideal tree in cases where local conditions may make other trees poor choices.

    Modern-Day Revival

    In recent years, there has been a resurgence of interest in the paw paw tree, driven by the growing demand for locally sourced and sustainable food options. Chefs, food enthusiasts, and environmentalists are rediscovering the tree’s culinary and ecological significance. Due to this, people are investigating ways to promote its cultivation and conservation.

    Culinary Significance

    The paw paw fruit is a gastronomic delight, with a flavor profile that is often described as a combination of banana, mango, and pineapple. The fruit’s creamy texture and sweet taste make it a versatile ingredient, suitable for a range of culinary applications. Paw paw can be enjoyed raw, used in baked goods, or as a topping for yogurt or oatmeal. It’s also a popular ingredient in smoothies, ice cream, and desserts. The paw paw is also the only fruit that contains all of the essential amino acids.

    Despite its borderline ‘delicacy’ status, the paw paw fruit is notoriously difficult to enjoy outside of foraging for it in nature. This is due to several factors that affect its cultivation, harvesting, and distribution. Here are some challenges that make enjoying a paw paw in our modern culture difficult:

    1. Perishability: Paw paw fruit is highly perishable, with a short shelf life of typically 3-5 days after ripening. This makes it challenging to transport and store the fruit without significant spoilage.
    2. Fragility: Paw paws are easily bruised and damaged during handling, which can lead to spoilage and reduced quality. In addition to this, the paw paw will not ripen after it is picked from the tree. The best tasting fruit can usually be found immediately after it falls from the tree.
    3. Cultivation challenges: Paw paw trees are not as widely cultivated as other fruit trees, partly due to the difficulties in propagating and growing them on a commercial scale. Paw paw trees have specific requirements, such as shade, moist soils, and a narrow temperature range. In addition to this, they are unable to self-pollinate.

    Growing Paw Paw Trees

    On a small scale though, paw paw trees are relatively easy to cultivate. The trees prefer well-drained soil and partial shade, making them suitable for woodland gardens or permaculture designs. Paw Paw will send up clonal shoots near them, but this will ultimately lead to a lack of fruit due to the lack of genetic diversity. To get the best fruit, you need transplant plants from different locations. The clonal nature of these trees sometimes make this difficult because you miss the developed root structure. It’s often best to propagate via seed or grafting. Propagation via seed requires an extensive period of cold stratification.

    The paw paw tree is a testament to the complex and multifaceted history of America. Its significance extends far beyond its role as a food source, speaking to the intricate relationships between the land, the indigenous populations, and the early European settlers. So, the next time you find yourself wandering through the eastern North American wilderness, take a moment to seek out and appreciate this unassuming yet extraordinary tree – and, if you’re lucky, savor the sweet taste of its forgotten fruit!

  • Hügelkultur in Pennsylvania

    Hügelkultur in Pennsylvania

    Hügelkultur in Pennsylvania: Nature’s Raised Bed

    Years ago, hurricane Sandy turned my forested property into an open meadow with massive rotting tree stumps everywhere.  The trees on my property that used to provide shade and beauty, now produced a steady supply of fallen branches, logs, and leaves.  Since I had already been slowly ‘rewilding’ my lawn area, it seemed only natural to consider a gardening technique that turned this “debris” into a gold mine of fertility: Hügelkultur.

    What is Hügelkultur?

    Hügelkultur, pronounced “hoo-gul-kultur,” translates to “mound culture” or “hill culture.” It’s a centuries-old gardening method that involves creating raised garden beds by mounding logs, branches, leaves, compost, and soil. Think of it as a lasagna garden, but with a woody base layer. This base layer is the key to Hügelkultur’s many benefits.

    Why Hügelkultur is a Win-Win for Your Garden

    Hügelkultur provides many benefits.  As long as you have the ingredients on hand, the only real drawback I can think of is that many people don’t like the way the mounds look.  I’ll assume that this isn’t an issue for you and just dive right into why Hügelkultur is a win-win for your garden.

    1. Waste Reduction and Recycling: Hügelkultur is an excellent way to repurpose organic materials that would otherwise end up in a landfill or burn pile. You’re essentially recycling your yard waste into rich, fertile soil.  This is also way to reuse the spent substrate from my mycology hobby.

    2. Improved Soil Structure: The decomposing wood acts like a sponge, absorbing water and releasing it slowly to plants. This makes Hügelkultur beds incredibly drought-resistant and perfect for our sometimes unpredictable Pennsylvania weather.

    3. Increased Fertility: As the wood breaks down, it creates a nutrient-rich environment for plants. This slow-release fertilizer eliminates the need for synthetic inputs, leading to healthier and more productive gardens.

    4. Warm Beds: The decomposition process generates heat, creating a microclimate that can extend your growing season. This is especially beneficial in Southeastern PA, where our spring and fall seasons can be fickle.

    5. Habitat for Beneficial Organisms: The complex environment of a Hügelkultur bed provides shelter and food for a wide range of beneficial organisms, from earthworms to microbes. These creatures contribute to the overall health of your soil and garden.

    Hügelkultur in Pennsylvania

    Southeastern Pennsylvania is uniquely suited to Hügelkultur for several reasons:

    • Abundance of Woody Material: The deciduous forests of southeastern PA provide ample materials for building Hügelkultur beds. Oak, maple, hickory, and other hardwood species are excellent choices for the base layer.

    • Climate: Our moderate temperatures and ample rainfall provide ideal conditions for the decomposition process within the bed.

    • Soil Types: While our soils vary, Hügelkultur can be adapted to most conditions. In heavier clay soils, the mounded structure improves drainage. In sandier soils, the woody material helps retain moisture.

    Building Your Hügelkultur Bed

    Here’s a simplified guide to getting started:

    1. Choose a Location: Select a sunny or partially shaded spot with good drainage.

    2. Create a Base: Lay down logs and branches, the larger the better. Cover with smaller branches, twigs, and leaves.

    3. Add Layers: Layer on compost, manure, and topsoil, building a mound.

    4. Plant: Hügelkultur beds are ideal for a wide variety of plants, from vegetables and herbs to perennials and shrubs. Experiment to see what thrives in your mound.

    Important Considerations:

    • Wood Choice: Avoid using black walnut, as it contains juglone, a chemical that can inhibit the growth of some plants. Treated lumber should also be avoided due to potential chemical leaching. Stick to untreated hardwood like oak, maple, or hickory for the best results.

    • Patience: The decomposition process in a Hügelkultur bed takes time. The full benefits, like improved soil structure and nutrient release, may not be realized for a few years. Be patient, and enjoy the journey as your mound matures.

    • Maintenance: While Hügelkultur beds are relatively low-maintenance, they do require some attention. Monitor moisture levels, especially in the first few years, as the woody material absorbs water. Top dress with compost or mulch annually to replenish nutrients.  This is a great place to dump the soil from your container garden when the season is over.

    • Plant Selection: Choose plants that thrive in well-drained soil and can tolerate the heat generated by the decomposing wood. Some good options for southeastern PA include tomatoes, peppers, squash, beans, herbs, and perennials like lavender and coneflower.

    • Scale: Start small if you’re new to Hügelkultur. A smaller bed is easier to manage and allows you to experiment with different materials and techniques. As you gain experience, you can expand or create additional beds.

    Your Journey to Hügelkultur in Pennsylvania (and everywhere!)

    Hügelkultur is an exciting way to transform your landscape and gardening practices. It is more than just a gardening technique; it’s a philosophy of working with nature to create a sustainable and abundant garden.  By embracing this ancient technique, you’re not only creating a fertile oasis for plants but also contributing to leading a more eco-conscious way of life.

    If you’re ready to embark on your Hügelkultur journey, I encourage you to take the first step. Experiment, learn, and adapt this method to your specific needs and environment. And remember, you’re not alone!

    I’d love to hear about your Hügelkultur experiences, successes, and challenges. Feel free to share your questions, photos, or insights in the comments below. Together, we can create a thriving community of Hügelkultur enthusiasts in Southeastern Pennsylvania!

  • Sprouts Vs. Microgreens

    Sprouts Vs. Microgreens

    Are these sprouts?  Are these microgreens?  Is their a difference between the two?  The answer is: Yes there is a difference.  I grow both and if you keep reading, I’ll describe how they differ and which one in my opinion is the overall winner in the Sprouts vs. Microgreens battle.

    Growing Sprouts vs. Microgreens

    So why would anyone want to grow sprouts or microgreens, especially instead of a full grown plant of the same variety?  There are some easy answers here and some others that are more nuanced.

    Lack of Space

    Probably the most obvious reason for growing either of these is a lack of gardening space.   Many of the varieties used for both sprouts and microgreens would require feet of space just for a few plants.  You could grow hundreds or thousands of sprouts or microgreens in this same amount of space.

    Lack of Time

    Another reason for growing sprouts or microgreens is a lack of time.  For full grown plants, you will need a month or more from seeding time before you can actually harvest.  Harvest times for sprouts and microgreens are on the order of days/weeks.

    Lack of Cooperative Weather

    Due to the space and time saving benefits of growing sprouts and microgreens, you can make due with less than ideal weather conditions.  This is mostly because you can easily grow them in your kitchen.  Unlike growing full grown plants the need for bright light and always warm conditions is not necessary.

    Differences in Sprouts vs. Microgreens

    Before growing sprouts and microgreens,  you need to decide which product you ultimately want to harvest.  The following factors should be considered:

    Taste

    Different varieties of sprouts often taste very similar.  Microgreens have more flavor, often this is a more pronounced flavor from the fully grown plant.

    Intended Use

    Sprouts are often served as a garnish.  Microgreens can be combined to form a salad on their own, or used in much the same way as the greens from their fully grown counterparts.  Both can be used in smoothies.  It is recommended that you don’t cook microgreens as this will often degrade the nutrients that are present.

    Nutrition

    Sprouts will only provide the nutritional aspects of what is included in the raw seed.  This differs greatly based on the variety of seed used.  Many sources state that the sprouting process makes these vitamins and minerals more concentrated and available.  Microgreens typically provide more minerals and often a different nutritional profile than their sprouted counterparts.  I’ll discuss why this is when discussing differences in the growing process.

    How to Grow Sprouts and Microgreens?

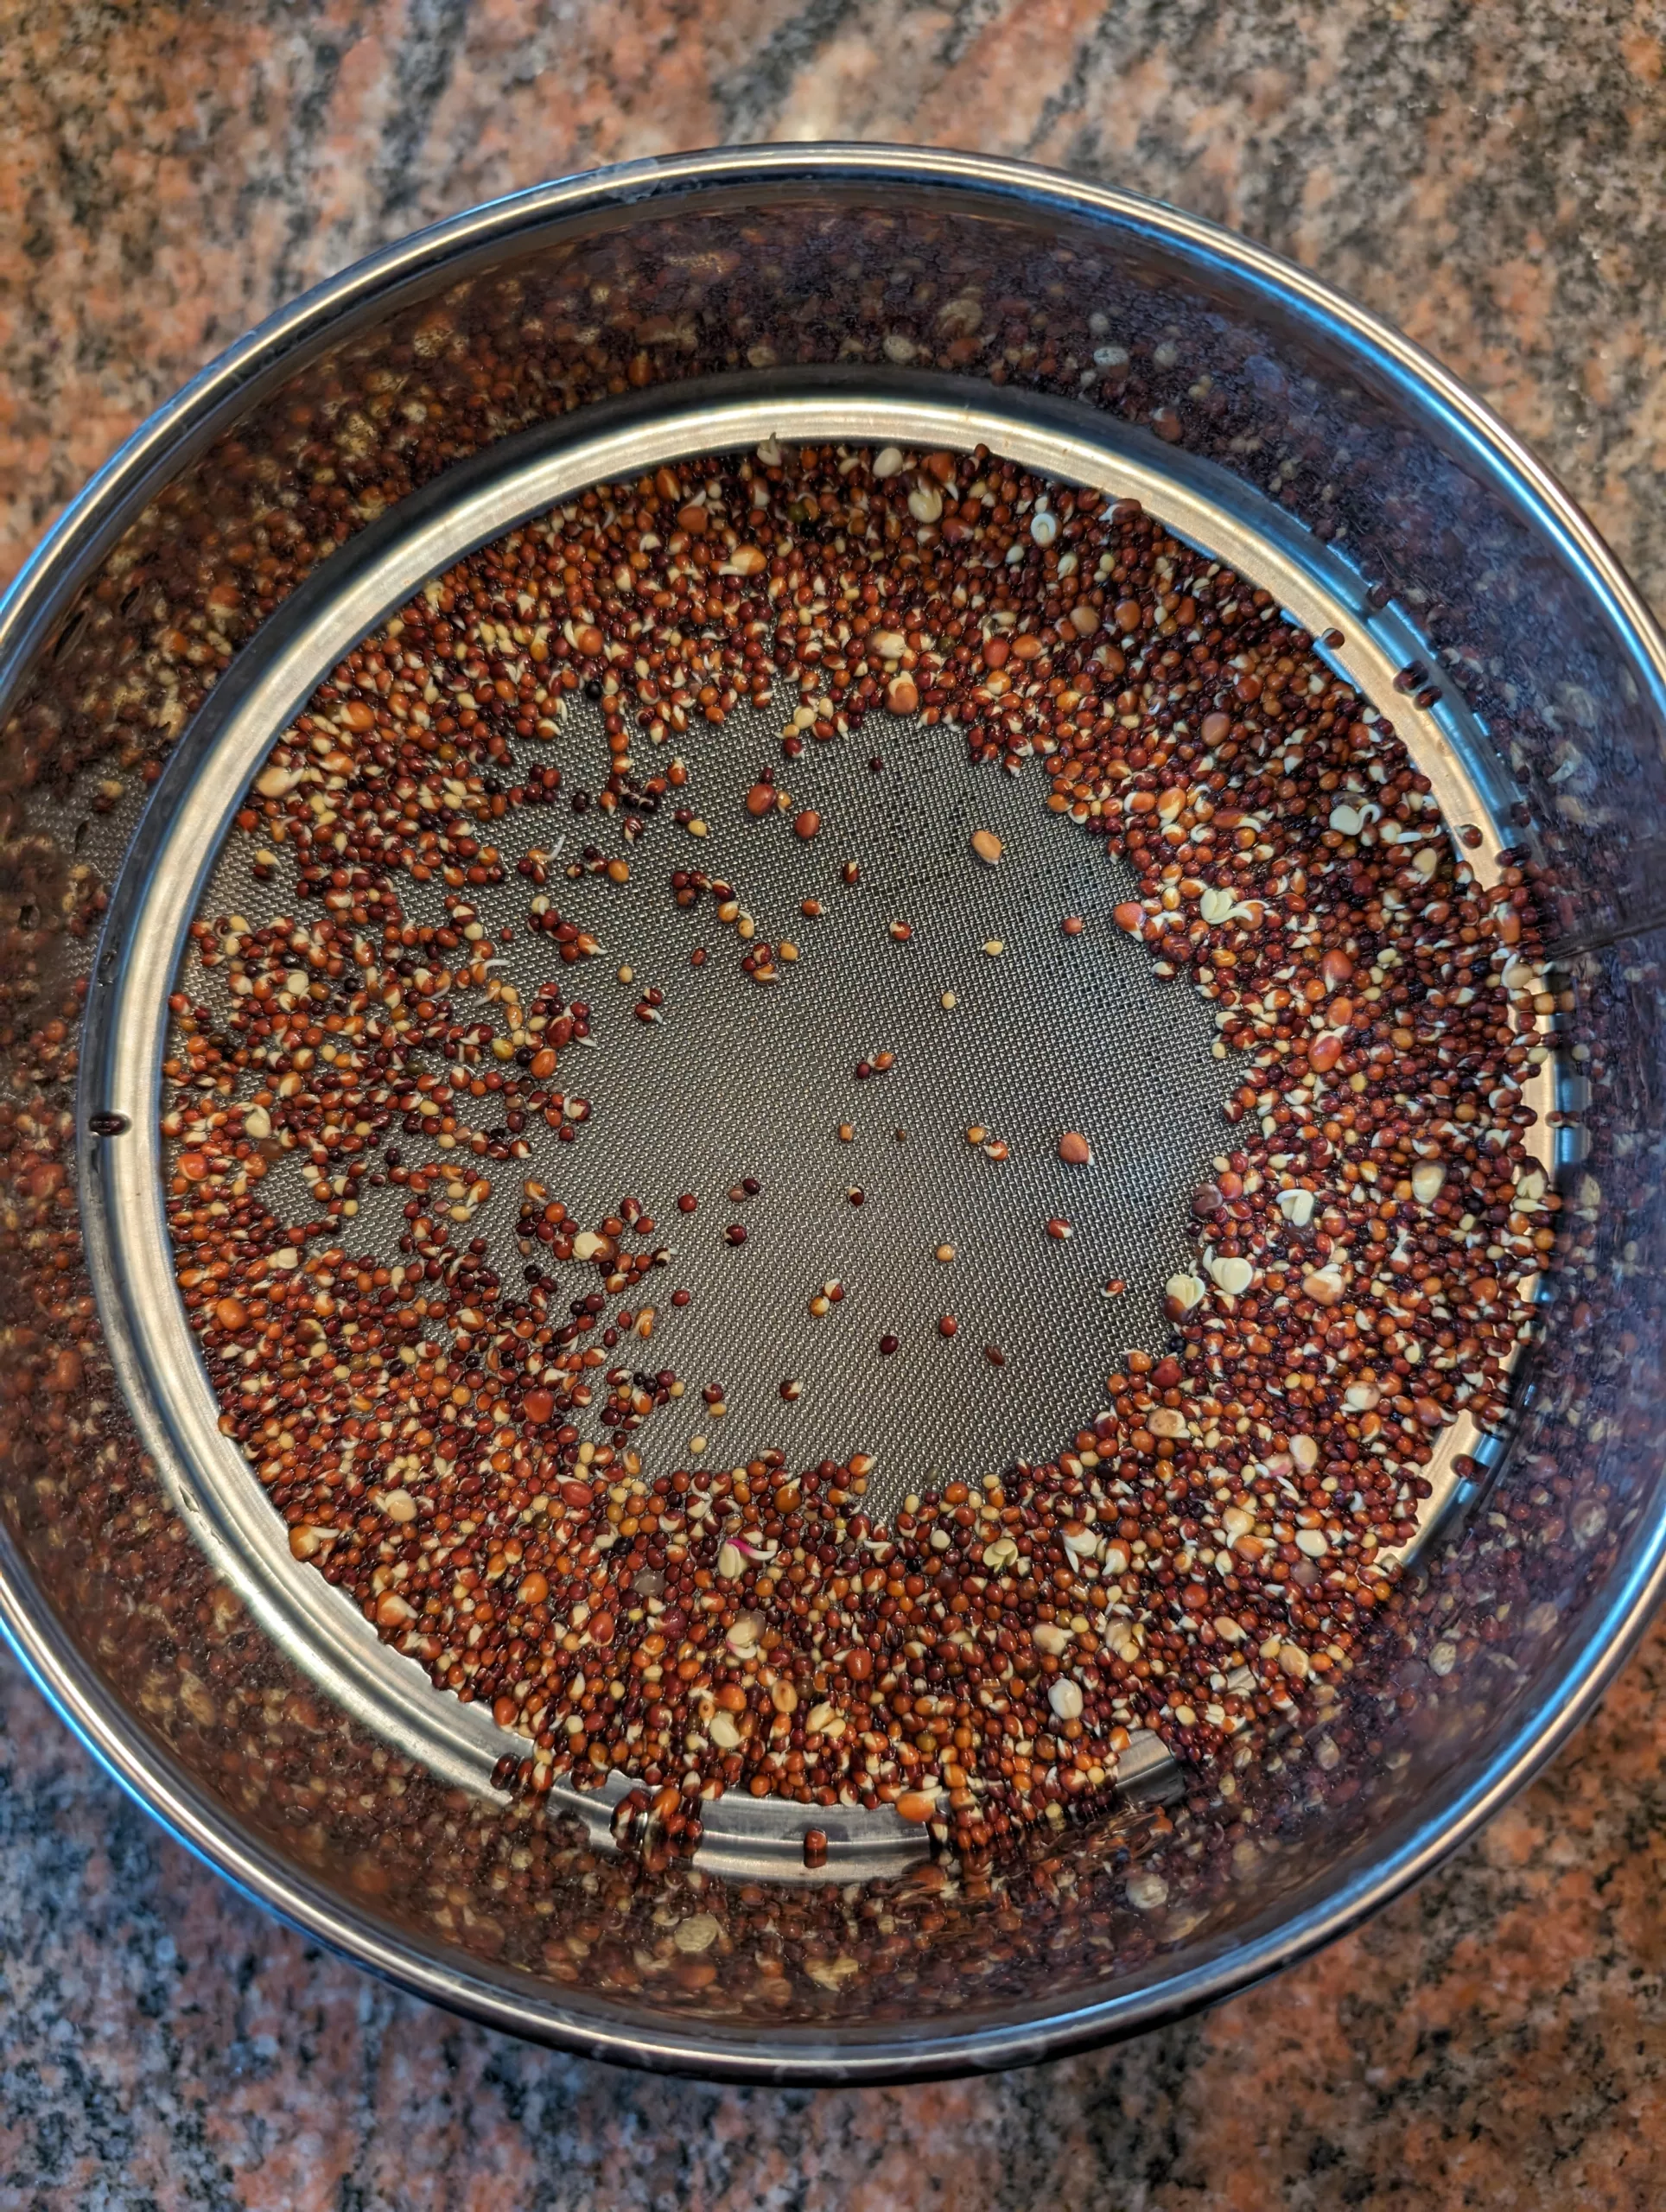
    Growing either sprouts or microgreens is a fairly similar process.  In both cases, you start with the same seeds that you would plant in your garden.  Commonly used seeds include brassicas, radishes, grasses, beets, herbs and other greens.  In both cases you provide a wet growing environment, but this is where the process starts to differ.

    Growing Medium

    For sprouts, you just need a container that allows you to store your seeds in a way that you can rinse them a few times a day and then let the water drain from the seeds.  Microgreens require a ‘medium’ to grow in.  This medium can be soil, but I like to use hemp or felt pads in a hydroponic environment.  The purpose of this medium is to supply additional nutrients to the plants so that they can grow beyond the ‘sprout’ stage.

    Light Requirements

    Sprouts don’t really require any light.  I tend to finish mine for a few days with indirect light just to make them look nicer.  This can be as simple as leaving them uncovered on a kitchen counter.  Because microgreens are grown into small versions of their typical plant size, a bit more light is required.  This is one of the reasons for the difference in nutritional aspects between sprouts and microgreens of the same plant variety.  Microgreens are undergoing more photosynthesis.  This combined with the added nutrients in the growing medium changes the nutritional profile of the microgreen.

    Time to Harvest

    Sprouts are ready to harvest in a few days.  Once the seed is broken open and a stem and root system are beginning, you can harvest at any time.  Microgreens take a week or more.  With microgreens you want to wait to harvest until the first ‘real’ sets of leaves appear.  When harvesting, you want to eat the entire sprout, stem, root, etc.  You want to discard everything in the growing medium with microgreens and only eat the actual stem/greens.

    The Sprouts vs. Microgreens Winner

    So who is the winner of Sprouts Vs. Microgreens?  For me, it’s sprouts.  I like the quick turn around time and the overall simplicity.  I also like the versatility of being able to add them to almost anything.  Many others are scared away from sprouts because of the chance that the growing environment can be a breeding ground for bacteria and mold.  If this is you, I have a few recommendations:

    1. Always rinse with cold water.  Not using warm/hot water helps keep the environment good for sprouts and bad for the nasties.
    2. Make sure your seeds are adequately spaced and drain properly in between waterings.
    3. Buy seeds from a reputable place.  Starting with high quality seeds that aren’t already contaminated is a great idea.
    4. Visually inspect the environment before each watering.  A quick check for mold or bacterial growth before each watering will allow you to abandon your sprouts the moment you know something is wrong.  Just don’t confuse some ‘fuzziness’ of the early roots for mold 😁
    5. If you don’t feel confident doing these things… Grow Microgreens instead!
  • Planning a Gardening Season

    Planning a Gardening Season

    It’s January!  That means it’s time to start planning the upcoming garden season.  Planning a gardening season is one of the most important factors in helping you guarantee that it’s successful.  In this article, I’m going to describe the process I use in planning a gardening season.  I’m going to assume that you already have a gardening space setup and that you have at least one season under your belt.  On to discussing the things that I do in an effort to improve every year.

    Evaluate Your Past Season

    The first step in planning a gardening season is evaluating your last season.  Did you have enough space to grow everything that you wanted to?  What grew well?  What went wrong related to pests or disease?  Did you have enough time to tend to the garden effectively?  Being honest about your failures (and successes) will go a long way in helping you become a better gardener.

    Identify Your New Season Goals

    After evaluating your past season, it’s time to set goals for the upcoming season.  Maybe you need more gardening space?  Perhaps you had a new issue that you had to deal with and want to figure out a way to prevent that from happening again?  I often have recurring issues and I’m constantly trying new things in order to find more effective solutions.  Each year, I find that I want to try my hand at growing something new.  Also, every season, I try to convert one more area of my growing space into a more permaculture inspired food forest that doesn’t really require my constant intervention.  No matter what else I identify as goals, I’m always trying to figure out ways to save more time while still generating the same amount of (or hopefully more!) crops.

    Create a Plan

    Now it’s necessary to take your goals and create a plan for your gardening season.  Evaluating your past season provides important information for this step.  It goes without saying, that it is crucial to understand the planting dates that you need to hit for your gardening zone.  Maybe you started seeds too late last year? Or you were so excited to get started that you lost something put outside a bit too early?  Having a plan helps account for these types of issues.  I discuss my “Planting Calendar” approach for this below.

    You’ll need to factor in any infrastructure based projects keeping this in mind.  It’s great when some of these projects can be researched/worked on before your actual gardening season begins.  If this can’t be done, you’ll need to identify the best place to fit these in during your season.

    Obtain Seeds

    If you need to buy seeds, January is the latest to start thinking about purchasing if you want the best selection.  I determine the list of what I need to order by first evaluating what I already have from prior seasons.  This is easy to do because I maintain a seed inventory spreadsheet for each gardening season.  Before I make my order, I’ll take the seed inventory from the prior season and go through row by row to see if I still have any of the original seeds from that row remaining.  If I don’t, and I haven’t saved any seed from that crop in the prior season, I’ll delete that row from a copy of the spreadsheet.

    It’s important to keep track of how old your seeds are.  Seeds of different plants also have different viable lifetimes that you will need to be familiar with.  This is why my seed inventory spreadsheet has a column for tracking the year that the seeds were purchased/harvested in.  So if I’m using harvested seeds, I’ll be sure to update the year in that spreadsheet accordingly.  After making these updates, you can go through the spreadsheet and identify what seeds you need to acquire for the upcoming season.

    Organize

    The seed inventory spreadsheet is just the starting point for your plan for the upcoming gardening season, so it’s important to keep everything organized.  I manage my full plan for the gardening season in Google Drive.  I create a folder for each year.  This folder contains the seed inventory spreadsheet for that year, but also is the spot where I add everything related to that gardening season.  At a bare minimum, this will include my seasonal gardening journal.  I’ll discuss this more in the “Track Your Progress” section below.

    So why is it important to have an organization plan?  We’ve kind of defined ‘what’ you want to plant, but we haven’t really addressed ‘when’ (or ‘where’).  We also haven’t even discussed non-planting projects for the gardening season.

    Planting Calendar

    As I mentioned above, it’s important to understand your gardening season schedule in terms of your particular weather climate.  I maintain a planting calendar for my particular micro-climate of Zone 7a.  I’ve adjusted this over the last few years of gardening here to reflect my success growing on the northern slope of a higher point in Montgomery County.  I keep a master copy of this outside of my specific gardening season folders unless there’s a reason to create a more specific version tailored to the season.

    Where to Plant?

    Most crops, especially outside of a permaculture garden, cannot be planted in the same spot year after year.  You’ll need some way of tracking where each crop was grown in each season so that you can move them to a different section.  In many cases, this isn’t as simple as just ‘don’t plant tomatoes here every year’.  There are certain families of plants that shouldn’t be grown in the same spot.  There are also anti-companion plants that aren’t even in the same family.  A great introductory resource on the ins and outs of companion planting is “Carrots Love Tomatoes”.

    In addition to rotating your crops, identifying any microclimates that you may have is a good idea.  Taking advantage of microclimates can effectively extend your gardening season.  At the bare minimum, leveraging microclimates can help you save time in your gardening endeavors.  Crop rotation into and out of microclimates can impact the dates in your planting calendar, so be sure to note this in your gardening journal for the season.

    Infrastructure Projects

    One thing that can require season specific updates to the planting calendar are infrastructure projects.  If I’m building a new garden bed, automated system or a more extensive permaculture project, I’ll use my main planting calendar to determine the absolute latest point for when the project needs to be completed.  If I’m lucky, I’ll be able to find a time that’s less busy from a planting perspective.  All plans and research for these projects is stored in my gardening folder for the season.  This way, I can refer back to when these projects were completed for any details that I may have forgotten.

    Once the research for these projects is completed, I can then start ordering the necessary supplies.  During this research phase, I also plan out what non-seed consumables I need to replace for the season.  This could be soil/amendments, replacing any broken tools/supports.  Growing new crops, or even changing where prior crops were grown may also require you to purchase more containers and/or supports.

    Track Your Progress

    After you have a way to keep everything organized, it’s finally time to get started!  Follow your planting calendar and evaluate what tasks you need to complete on a weekly basis.  As I already mentioned, I start buying seeds no later than January.  Germination for some things begins not long after.  I try to extend my seasons by making the most of indoor gardening.  Just remember that the key to improving each year is to track your progress!

    Tracking for me starts with my seed inventory spreadsheet.  Each seed that I grow, I assign a simple tracking code to.  This can be something as simple as T02 (i.e. the second tomato variety that I’m growing in this season).  There is a column for this in my spreadsheet.  This serves as a shorthand for me to track what I’m doing with every variety without referring to the full variety name everywhere.

    Seed Starting

    I start my seeds in 72 cell germination stations.  Without an easy way to keep track of things, it’s very easy to lose sight of exactly what you’re growing.  I’ll create a new sheet in my seed inventory spreadsheet each time I start a new germination station.  I’ll label this sheet with the date the seeds were started and then put the shorthand for each seed into a cell in the spreadsheet that corresponds to the grid layout of the germination station.  If you move your seed starting trays, it’s also a good idea to mark them in a way so that you can always guarantee that it’s aligned with the grid on the spreadsheet.

    Transplanting

    Eventually, your seeds will need to be transplanted.  If I move them to containers, I label the container with my shorthand code.  When I ultimately plant the plants in the garden, I have 3D printed garden stakes that contain the shorthand code.  This allows me at any time, to identify the exact variety of what’s being grown for future note taking.

    Keep a Journal

    Tracking where you plant your plants is only one part of battle.  You will also need to be observant about any disease or pest issues that arise throughout the season.  Maybe you notice that one variety is not as productive as you would like?  It’s great to take as many notes as you can about these situations so that you can determine a better plan for the next season.  For this I keep a gardening journal.  This started out as a hand written notebook for me, but now I have a running document in my Google Drive folder.  I’ll note down the day and put as much  information as possible.  Note the shorthand for the plant, anything notable about the weather so far, microclimate, etc.

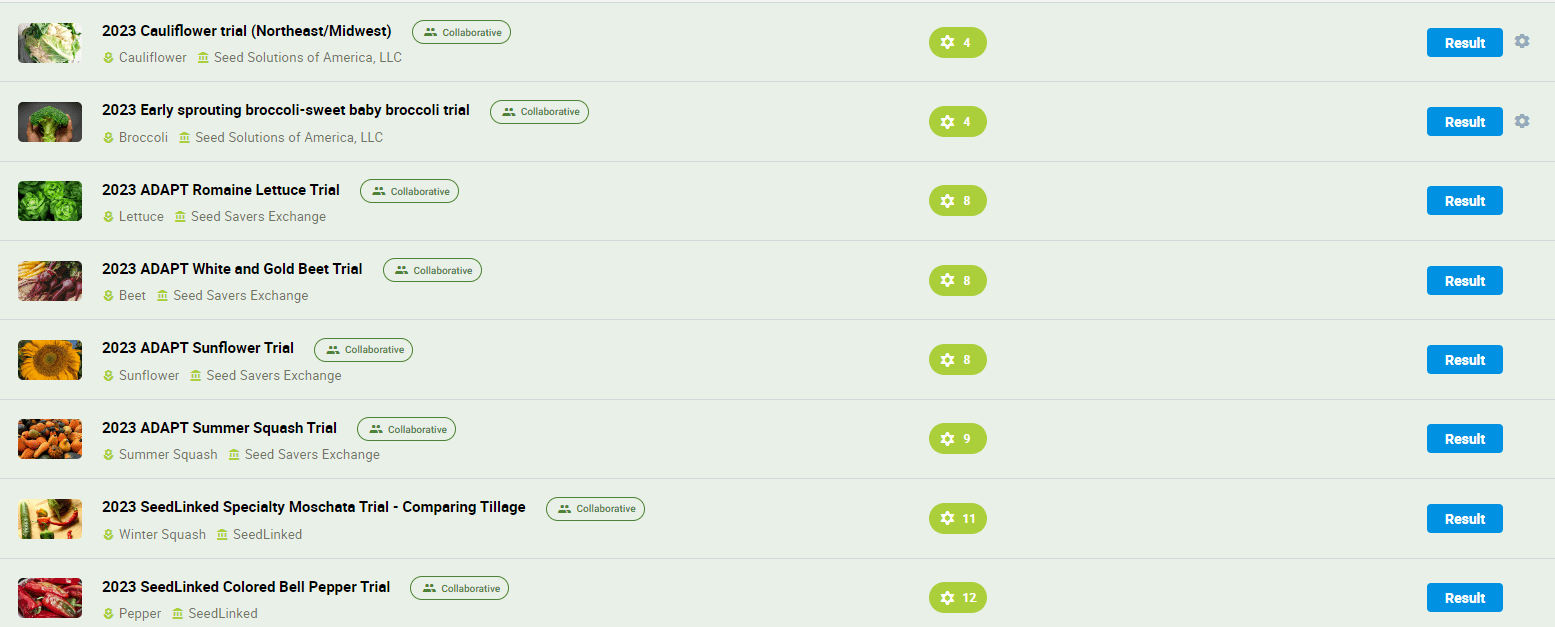
    Over the last few seasons, I’ve participated in several citizen scientist grows for different organizations.  When I obtain seeds for these trials, I denote which organization it is for in my seed inventory spreadsheet.  This is a reminder to me that anything I do with these seeds needs to adhere to the trial conditions specified by the organization that provided the seeds.  None of my typical experimenting is allowed here during the season of the trial.

    SeedLinked

    Initially, for these trials, everyone tried to provide feedback at the end of the season based on their own form of note keeping.  In an effort to streamline this, almost every organization has coalesced around using the SeedLinked platform to do this now.  I still keep my electronic journal, but many of the plant specific items that I note in the field are done using SeedLinked.  If you start using SeedLinked, be sure to search for me on that platform.

    Conclusion

    My gardening success as improved immensely since I’ve started following this fan.  It helps me question assumptions and keep track of things that I need to research further.  Doing something like this is necessary in order to be effective as a seed growing trial participant.  Do you have some tips for planning a gardening season that I haven’t covered here?  Are you interested in participating in some citizen scientist gardening trials?  Interested in discounts on gardening gear?  Drop me a line and let me know!