Category: Projects

  • Healthy Dessert Challenge: Peanut Butter Cookies

    Healthy Dessert Challenge: Peanut Butter Cookies

    In the first 2025 issue of Fermenting Solutions I laid out a goal for creating a “Healthy Dessert“.  Ultimately, I plan on actually creating several, but the first one that I am trying to perfect are Peanut Butter Cookies.  This recipe isn’t quite yet perfected, but I consider it good enough to share at this point.  I will update this page as I iterate on this healthy dessert.

    Healthy Peanut Butter Cookies

    So what makes a healthy peanut butter cookie?  For me, it’s all about increasing the protein content and decreasing the carb content.  This isn’t a low calorie dessert.  It is also sweetened, but using a sweetener that I find to be better than others.

    Ingredients

    • 1 cup No Sugar Added Peanut Butter (I like to keep it local and use Nutty Novelties’ Classic Crunchy Peanut Butter)
    • 1/2 cup Real Maple Syrup
    • 1 tsp Vanilla Extract
    • 1 cup finely ground Almond Flour made from blanched almonds
    • flaked salt to taste

    Is Maple Syrup Healthy?

    Why Maple Syrup?  There is more and more research coming out showing that real maple syrup has benefits over many other forms of ‘sugar’.  I specifically chose it for the recent studies showing that it helps reduce abdominal fat.

    The Process

    • Mix Peanut Butter, Maple Syrup and Vanilla Extract until well blended
    • Mix in Almond flour until it’s a consistent mixture
    • Use a spoon to drop mixture onto parchment paper placed on a baking sheet
    • Lightly smash down cookies with a fork
    • Sprinkle flaked salt on top of cookies
    • Bake at 350° F for 15 minutes

    Tips

    • You can prevent the fork from sticking to the cookies by using the heaviest fork you can find and dipping it in some of the flour you’re using before pressing.
    • I find the cookies have a better texture by rotating the baking sheet half way during baking.
  • Hügelkultur in Pennsylvania

    Hügelkultur in Pennsylvania

    Hügelkultur in Pennsylvania: Nature’s Raised Bed

    Years ago, hurricane Sandy turned my forested property into an open meadow with massive rotting tree stumps everywhere.  The trees on my property that used to provide shade and beauty, now produced a steady supply of fallen branches, logs, and leaves.  Since I had already been slowly ‘rewilding’ my lawn area, it seemed only natural to consider a gardening technique that turned this “debris” into a gold mine of fertility: Hügelkultur.

    What is Hügelkultur?

    Hügelkultur, pronounced “hoo-gul-kultur,” translates to “mound culture” or “hill culture.” It’s a centuries-old gardening method that involves creating raised garden beds by mounding logs, branches, leaves, compost, and soil. Think of it as a lasagna garden, but with a woody base layer. This base layer is the key to Hügelkultur’s many benefits.

    Why Hügelkultur is a Win-Win for Your Garden

    Hügelkultur provides many benefits.  As long as you have the ingredients on hand, the only real drawback I can think of is that many people don’t like the way the mounds look.  I’ll assume that this isn’t an issue for you and just dive right into why Hügelkultur is a win-win for your garden.

    1. Waste Reduction and Recycling: Hügelkultur is an excellent way to repurpose organic materials that would otherwise end up in a landfill or burn pile. You’re essentially recycling your yard waste into rich, fertile soil.  This is also way to reuse the spent substrate from my mycology hobby.

    2. Improved Soil Structure: The decomposing wood acts like a sponge, absorbing water and releasing it slowly to plants. This makes Hügelkultur beds incredibly drought-resistant and perfect for our sometimes unpredictable Pennsylvania weather.

    3. Increased Fertility: As the wood breaks down, it creates a nutrient-rich environment for plants. This slow-release fertilizer eliminates the need for synthetic inputs, leading to healthier and more productive gardens.

    4. Warm Beds: The decomposition process generates heat, creating a microclimate that can extend your growing season. This is especially beneficial in Southeastern PA, where our spring and fall seasons can be fickle.

    5. Habitat for Beneficial Organisms: The complex environment of a Hügelkultur bed provides shelter and food for a wide range of beneficial organisms, from earthworms to microbes. These creatures contribute to the overall health of your soil and garden.

    Hügelkultur in Pennsylvania

    Southeastern Pennsylvania is uniquely suited to Hügelkultur for several reasons:

    • Abundance of Woody Material: The deciduous forests of southeastern PA provide ample materials for building Hügelkultur beds. Oak, maple, hickory, and other hardwood species are excellent choices for the base layer.

    • Climate: Our moderate temperatures and ample rainfall provide ideal conditions for the decomposition process within the bed.

    • Soil Types: While our soils vary, Hügelkultur can be adapted to most conditions. In heavier clay soils, the mounded structure improves drainage. In sandier soils, the woody material helps retain moisture.

    Building Your Hügelkultur Bed

    Here’s a simplified guide to getting started:

    1. Choose a Location: Select a sunny or partially shaded spot with good drainage.

    2. Create a Base: Lay down logs and branches, the larger the better. Cover with smaller branches, twigs, and leaves.

    3. Add Layers: Layer on compost, manure, and topsoil, building a mound.

    4. Plant: Hügelkultur beds are ideal for a wide variety of plants, from vegetables and herbs to perennials and shrubs. Experiment to see what thrives in your mound.

    Important Considerations:

    • Wood Choice: Avoid using black walnut, as it contains juglone, a chemical that can inhibit the growth of some plants. Treated lumber should also be avoided due to potential chemical leaching. Stick to untreated hardwood like oak, maple, or hickory for the best results.

    • Patience: The decomposition process in a Hügelkultur bed takes time. The full benefits, like improved soil structure and nutrient release, may not be realized for a few years. Be patient, and enjoy the journey as your mound matures.

    • Maintenance: While Hügelkultur beds are relatively low-maintenance, they do require some attention. Monitor moisture levels, especially in the first few years, as the woody material absorbs water. Top dress with compost or mulch annually to replenish nutrients.  This is a great place to dump the soil from your container garden when the season is over.

    • Plant Selection: Choose plants that thrive in well-drained soil and can tolerate the heat generated by the decomposing wood. Some good options for southeastern PA include tomatoes, peppers, squash, beans, herbs, and perennials like lavender and coneflower.

    • Scale: Start small if you’re new to Hügelkultur. A smaller bed is easier to manage and allows you to experiment with different materials and techniques. As you gain experience, you can expand or create additional beds.

    Your Journey to Hügelkultur in Pennsylvania (and everywhere!)

    Hügelkultur is an exciting way to transform your landscape and gardening practices. It is more than just a gardening technique; it’s a philosophy of working with nature to create a sustainable and abundant garden.  By embracing this ancient technique, you’re not only creating a fertile oasis for plants but also contributing to leading a more eco-conscious way of life.

    If you’re ready to embark on your Hügelkultur journey, I encourage you to take the first step. Experiment, learn, and adapt this method to your specific needs and environment. And remember, you’re not alone!

    I’d love to hear about your Hügelkultur experiences, successes, and challenges. Feel free to share your questions, photos, or insights in the comments below. Together, we can create a thriving community of Hügelkultur enthusiasts in Southeastern Pennsylvania!

  • Planning a Gardening Season

    Planning a Gardening Season

    It’s January!  That means it’s time to start planning the upcoming garden season.  Planning a gardening season is one of the most important factors in helping you guarantee that it’s successful.  In this article, I’m going to describe the process I use in planning a gardening season.  I’m going to assume that you already have a gardening space setup and that you have at least one season under your belt.  On to discussing the things that I do in an effort to improve every year.

    Evaluate Your Past Season

    The first step in planning a gardening season is evaluating your last season.  Did you have enough space to grow everything that you wanted to?  What grew well?  What went wrong related to pests or disease?  Did you have enough time to tend to the garden effectively?  Being honest about your failures (and successes) will go a long way in helping you become a better gardener.

    Identify Your New Season Goals

    After evaluating your past season, it’s time to set goals for the upcoming season.  Maybe you need more gardening space?  Perhaps you had a new issue that you had to deal with and want to figure out a way to prevent that from happening again?  I often have recurring issues and I’m constantly trying new things in order to find more effective solutions.  Each year, I find that I want to try my hand at growing something new.  Also, every season, I try to convert one more area of my growing space into a more permaculture inspired food forest that doesn’t really require my constant intervention.  No matter what else I identify as goals, I’m always trying to figure out ways to save more time while still generating the same amount of (or hopefully more!) crops.

    Create a Plan

    Now it’s necessary to take your goals and create a plan for your gardening season.  Evaluating your past season provides important information for this step.  It goes without saying, that it is crucial to understand the planting dates that you need to hit for your gardening zone.  Maybe you started seeds too late last year? Or you were so excited to get started that you lost something put outside a bit too early?  Having a plan helps account for these types of issues.  I discuss my “Planting Calendar” approach for this below.

    You’ll need to factor in any infrastructure based projects keeping this in mind.  It’s great when some of these projects can be researched/worked on before your actual gardening season begins.  If this can’t be done, you’ll need to identify the best place to fit these in during your season.

    Obtain Seeds

    If you need to buy seeds, January is the latest to start thinking about purchasing if you want the best selection.  I determine the list of what I need to order by first evaluating what I already have from prior seasons.  This is easy to do because I maintain a seed inventory spreadsheet for each gardening season.  Before I make my order, I’ll take the seed inventory from the prior season and go through row by row to see if I still have any of the original seeds from that row remaining.  If I don’t, and I haven’t saved any seed from that crop in the prior season, I’ll delete that row from a copy of the spreadsheet.

    It’s important to keep track of how old your seeds are.  Seeds of different plants also have different viable lifetimes that you will need to be familiar with.  This is why my seed inventory spreadsheet has a column for tracking the year that the seeds were purchased/harvested in.  So if I’m using harvested seeds, I’ll be sure to update the year in that spreadsheet accordingly.  After making these updates, you can go through the spreadsheet and identify what seeds you need to acquire for the upcoming season.

    Organize

    The seed inventory spreadsheet is just the starting point for your plan for the upcoming gardening season, so it’s important to keep everything organized.  I manage my full plan for the gardening season in Google Drive.  I create a folder for each year.  This folder contains the seed inventory spreadsheet for that year, but also is the spot where I add everything related to that gardening season.  At a bare minimum, this will include my seasonal gardening journal.  I’ll discuss this more in the “Track Your Progress” section below.

    So why is it important to have an organization plan?  We’ve kind of defined ‘what’ you want to plant, but we haven’t really addressed ‘when’ (or ‘where’).  We also haven’t even discussed non-planting projects for the gardening season.

    Planting Calendar

    As I mentioned above, it’s important to understand your gardening season schedule in terms of your particular weather climate.  I maintain a planting calendar for my particular micro-climate of Zone 7a.  I’ve adjusted this over the last few years of gardening here to reflect my success growing on the northern slope of a higher point in Montgomery County.  I keep a master copy of this outside of my specific gardening season folders unless there’s a reason to create a more specific version tailored to the season.

    Where to Plant?

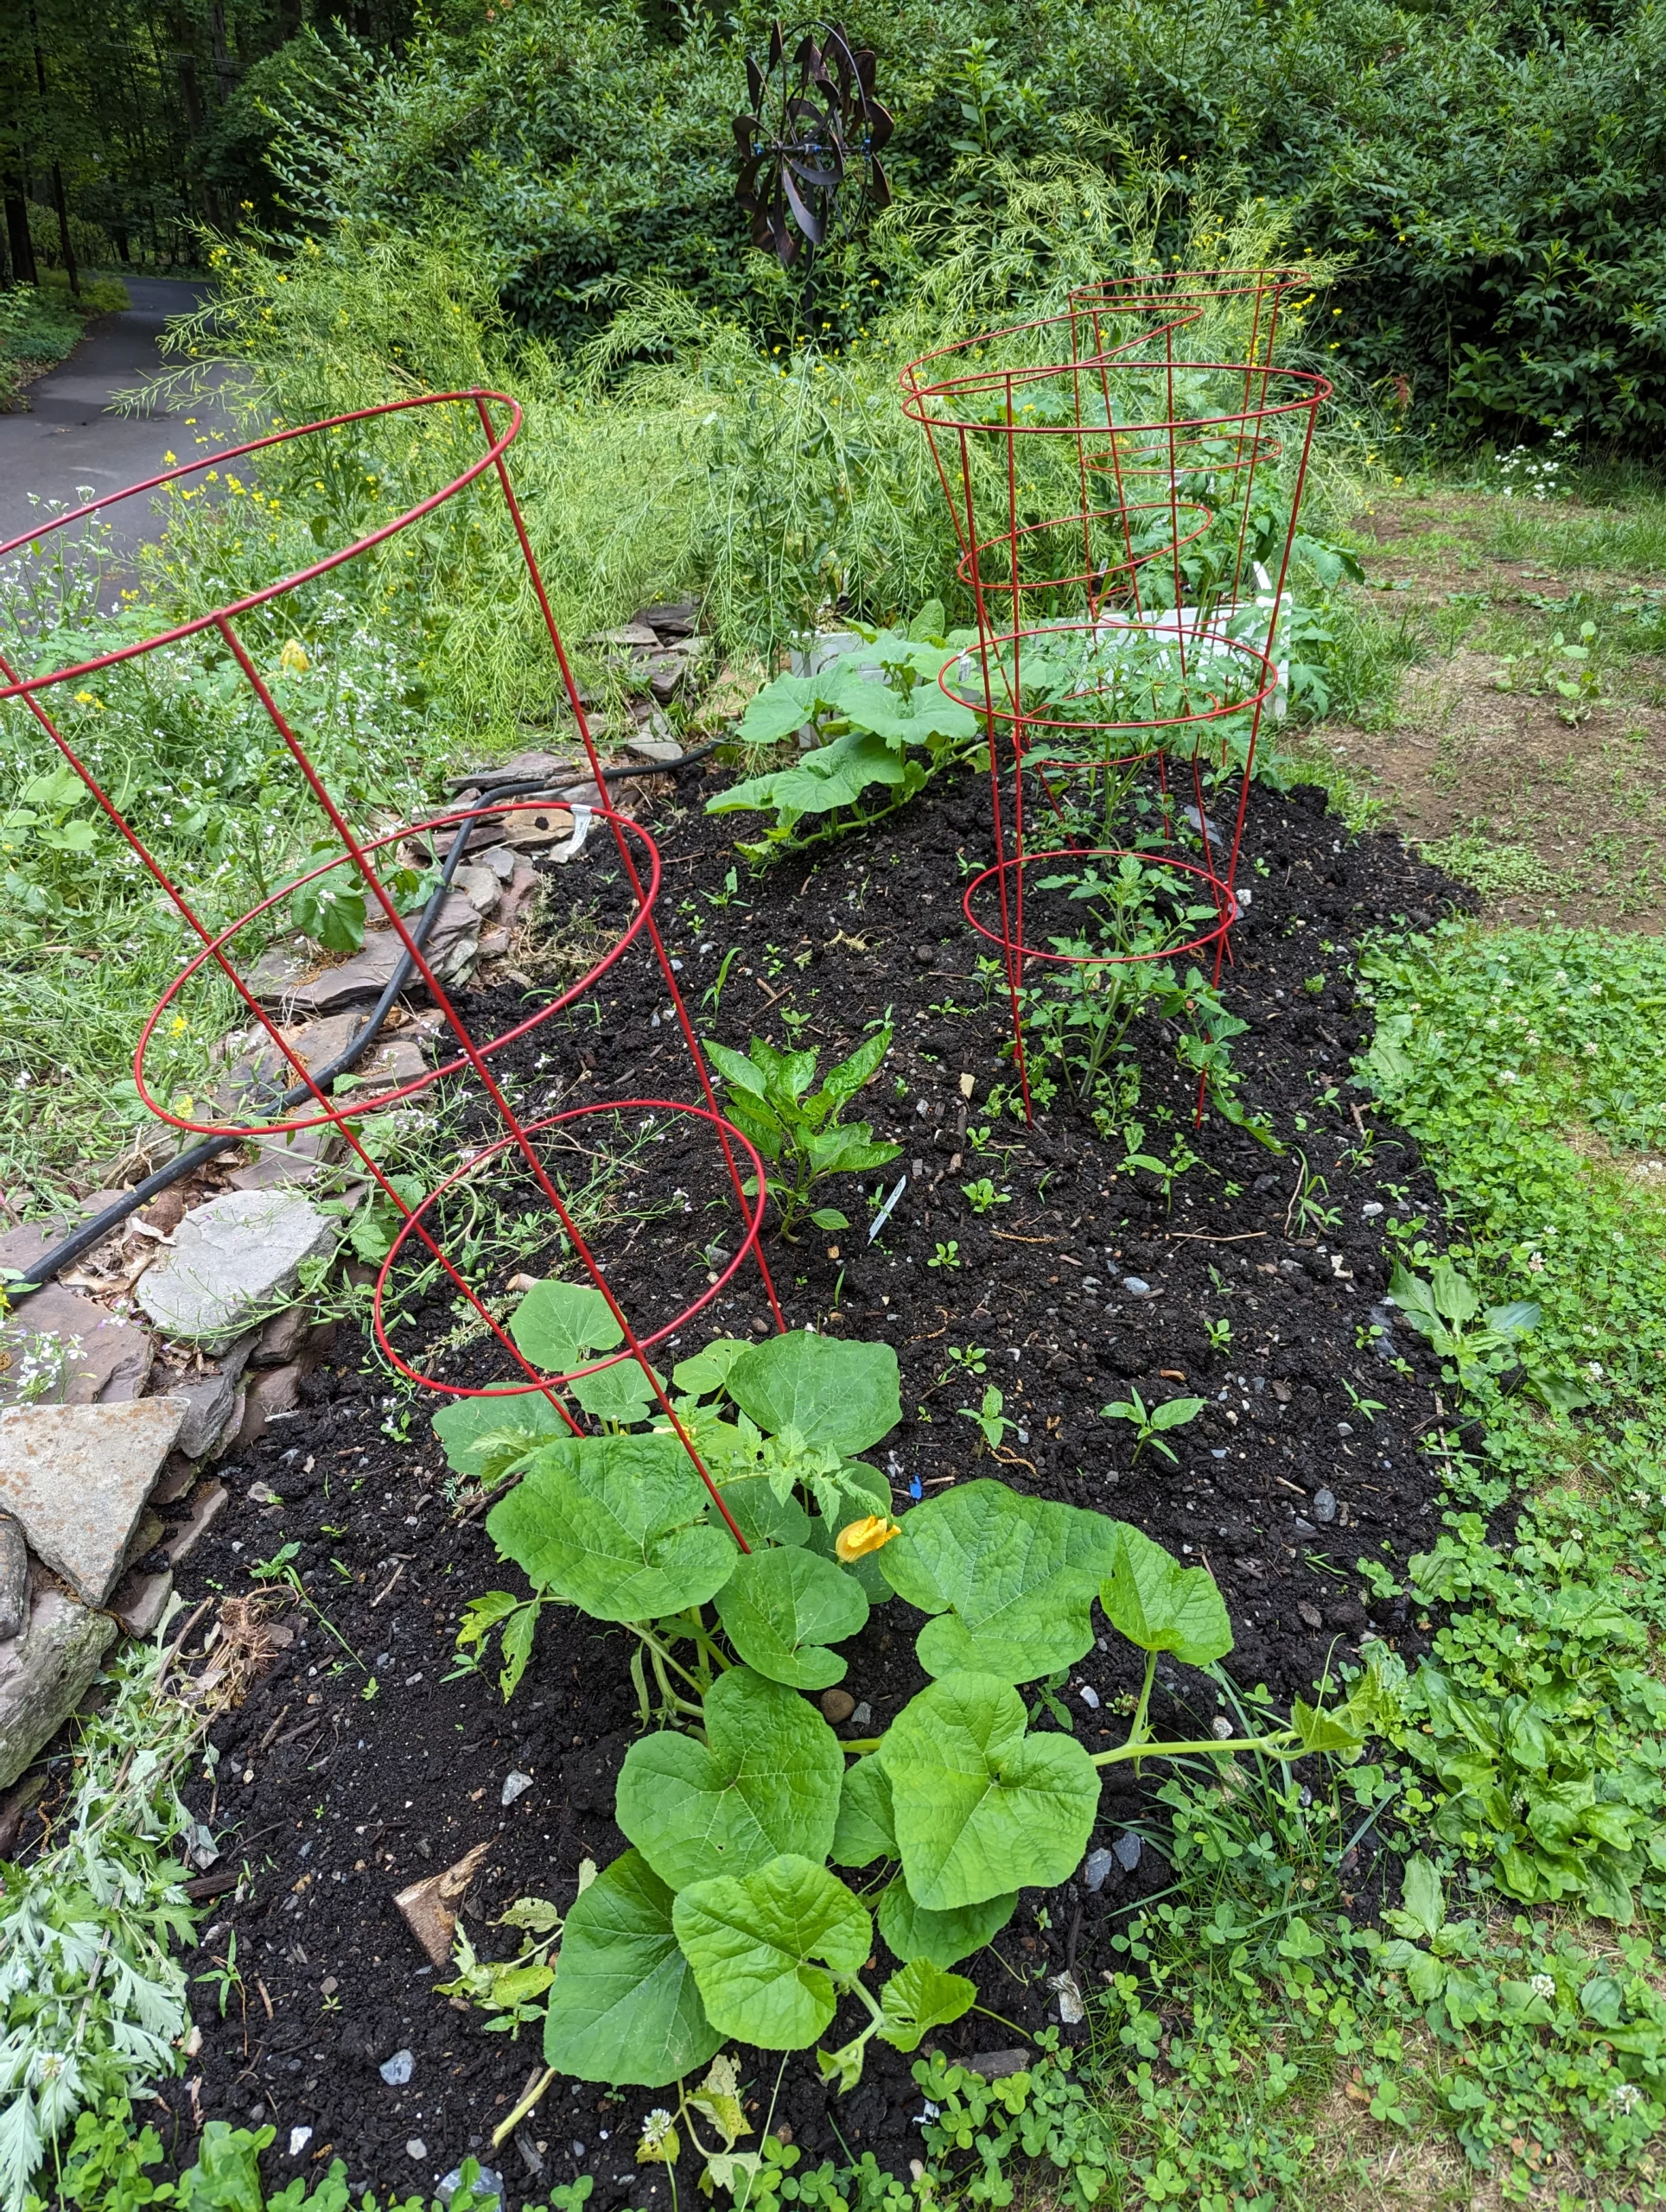
    Most crops, especially outside of a permaculture garden, cannot be planted in the same spot year after year.  You’ll need some way of tracking where each crop was grown in each season so that you can move them to a different section.  In many cases, this isn’t as simple as just ‘don’t plant tomatoes here every year’.  There are certain families of plants that shouldn’t be grown in the same spot.  There are also anti-companion plants that aren’t even in the same family.  A great introductory resource on the ins and outs of companion planting is “Carrots Love Tomatoes”.

    In addition to rotating your crops, identifying any microclimates that you may have is a good idea.  Taking advantage of microclimates can effectively extend your gardening season.  At the bare minimum, leveraging microclimates can help you save time in your gardening endeavors.  Crop rotation into and out of microclimates can impact the dates in your planting calendar, so be sure to note this in your gardening journal for the season.

    Infrastructure Projects

    One thing that can require season specific updates to the planting calendar are infrastructure projects.  If I’m building a new garden bed, automated system or a more extensive permaculture project, I’ll use my main planting calendar to determine the absolute latest point for when the project needs to be completed.  If I’m lucky, I’ll be able to find a time that’s less busy from a planting perspective.  All plans and research for these projects is stored in my gardening folder for the season.  This way, I can refer back to when these projects were completed for any details that I may have forgotten.

    Once the research for these projects is completed, I can then start ordering the necessary supplies.  During this research phase, I also plan out what non-seed consumables I need to replace for the season.  This could be soil/amendments, replacing any broken tools/supports.  Growing new crops, or even changing where prior crops were grown may also require you to purchase more containers and/or supports.

    Track Your Progress

    After you have a way to keep everything organized, it’s finally time to get started!  Follow your planting calendar and evaluate what tasks you need to complete on a weekly basis.  As I already mentioned, I start buying seeds no later than January.  Germination for some things begins not long after.  I try to extend my seasons by making the most of indoor gardening.  Just remember that the key to improving each year is to track your progress!

    Tracking for me starts with my seed inventory spreadsheet.  Each seed that I grow, I assign a simple tracking code to.  This can be something as simple as T02 (i.e. the second tomato variety that I’m growing in this season).  There is a column for this in my spreadsheet.  This serves as a shorthand for me to track what I’m doing with every variety without referring to the full variety name everywhere.

    Seed Starting

    I start my seeds in 72 cell germination stations.  Without an easy way to keep track of things, it’s very easy to lose sight of exactly what you’re growing.  I’ll create a new sheet in my seed inventory spreadsheet each time I start a new germination station.  I’ll label this sheet with the date the seeds were started and then put the shorthand for each seed into a cell in the spreadsheet that corresponds to the grid layout of the germination station.  If you move your seed starting trays, it’s also a good idea to mark them in a way so that you can always guarantee that it’s aligned with the grid on the spreadsheet.
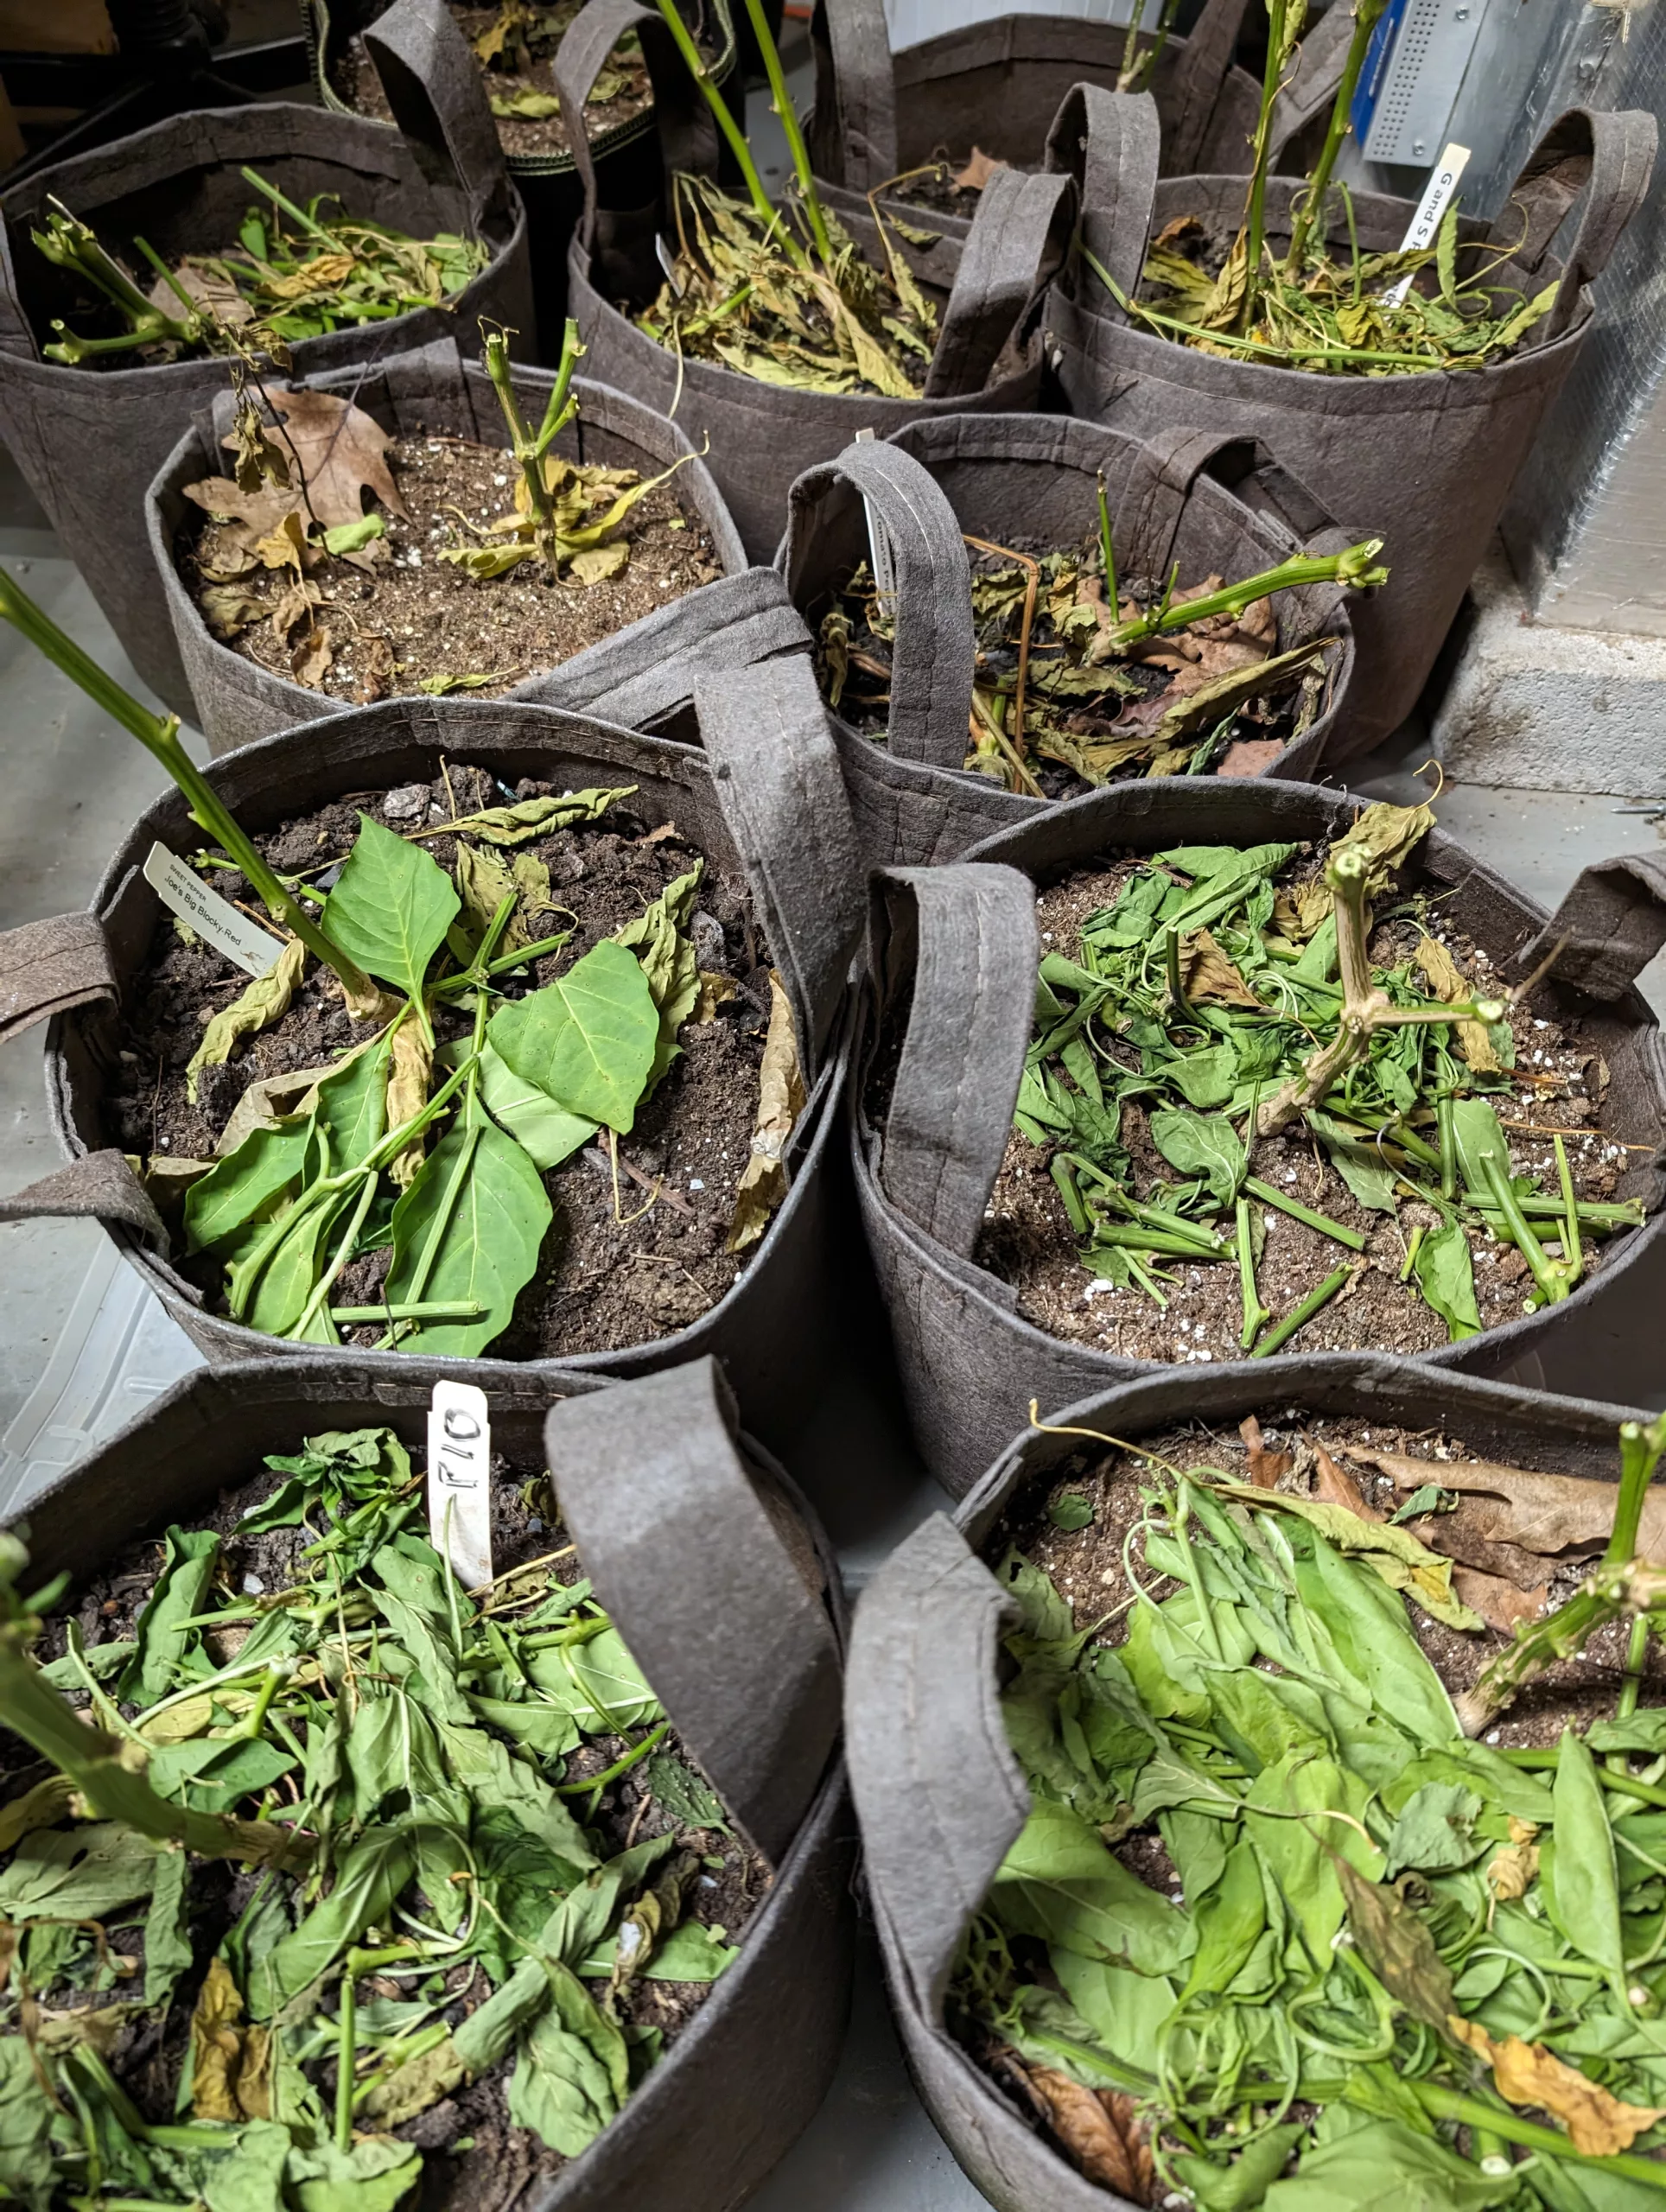
    Transplanting

    Eventually, your seeds will need to be transplanted.  If I move them to containers, I label the container with my shorthand code.  When I ultimately plant the plants in the garden, I have 3D printed garden stakes that contain the shorthand code.  This allows me at any time, to identify the exact variety of what’s being grown for future note taking.

    Keep a Journal

    Tracking where you plant your plants is only one part of battle.  You will also need to be observant about any disease or pest issues that arise throughout the season.  Maybe you notice that one variety is not as productive as you would like?  It’s great to take as many notes as you can about these situations so that you can determine a better plan for the next season.  For this I keep a gardening journal.  This started out as a hand written notebook for me, but now I have a running document in my Google Drive folder.  I’ll note down the day and put as much  information as possible.  Note the shorthand for the plant, anything notable about the weather so far, microclimate, etc.

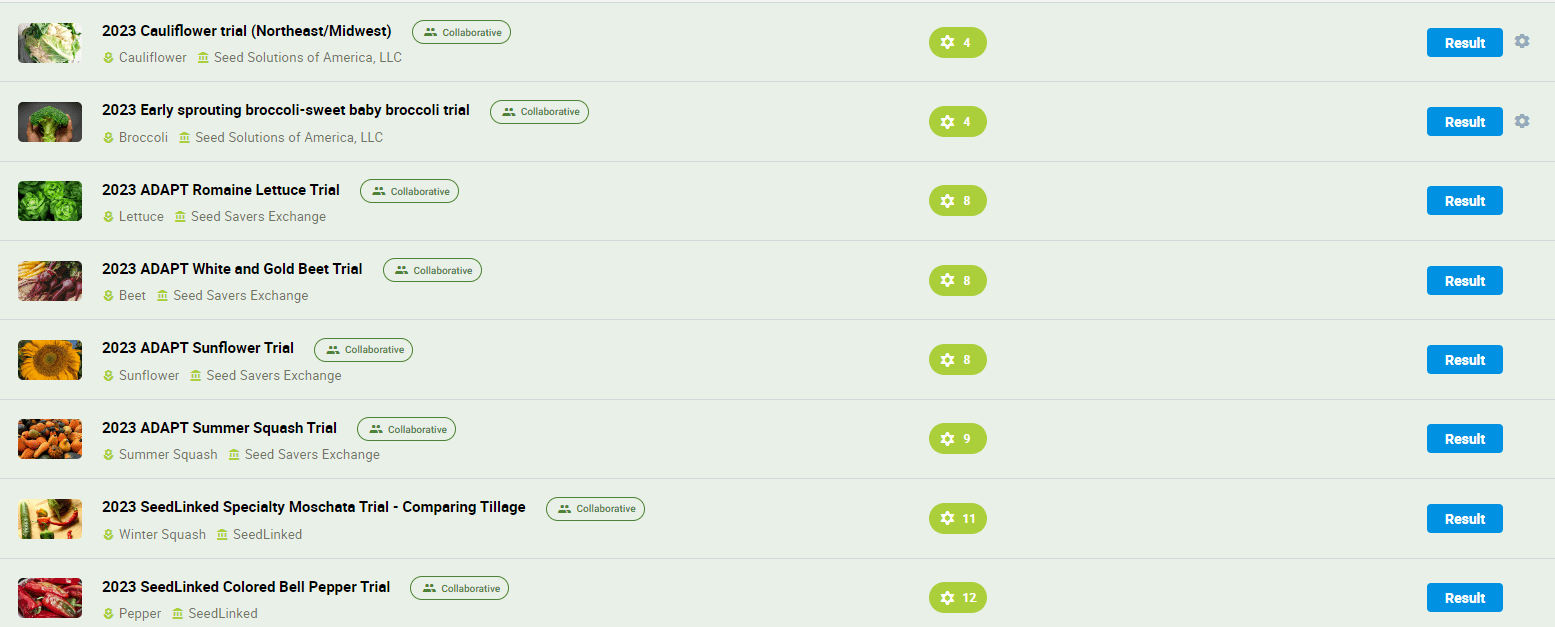
    Over the last few seasons, I’ve participated in several citizen scientist grows for different organizations.  When I obtain seeds for these trials, I denote which organization it is for in my seed inventory spreadsheet.  This is a reminder to me that anything I do with these seeds needs to adhere to the trial conditions specified by the organization that provided the seeds.  None of my typical experimenting is allowed here during the season of the trial.

    SeedLinked

    Initially, for these trials, everyone tried to provide feedback at the end of the season based on their own form of note keeping.  In an effort to streamline this, almost every organization has coalesced around using the SeedLinked platform to do this now.  I still keep my electronic journal, but many of the plant specific items that I note in the field are done using SeedLinked.  If you start using SeedLinked, be sure to search for me on that platform.

    Conclusion

    My gardening success as improved immensely since I’ve started following this fan.  It helps me question assumptions and keep track of things that I need to research further.  Doing something like this is necessary in order to be effective as a seed growing trial participant.  Do you have some tips for planning a gardening season that I haven’t covered here?  Are you interested in participating in some citizen scientist gardening trials?  Interested in discounts on gardening gear?  Drop me a line and let me know!

  • Overwintering Pepper Plants

    Overwintering Pepper Plants

    People are often surprised when I tell them that I have pepper plants that are a decade old.  This is because I’ve been overwintering pepper plants for several years.  Following this overwintering procedure makes the most of your harvest and allows you to get a jump start in subsequent seasons.

    Why Overwinter Pepper Plants?

    So what does overwintering pepper plants buy you?

    I enjoy peppers.  When I say “pepper”, I’m mostly talking about those insanely hot and flavorful varieties.  These are the types that you usually can’t just pick up at your local garden center.  Even finding the seeds for them sometimes requires a lot of searching, expense, etc.  Once you start growing them, these varieties of peppers grown from seed rarely have a chance to produce prolific fruit in my relatively short growing season.  I tried this early on, and mostly just got frustrated when I went to all this trouble to get no or minimal fruit.  My pepper plant overwintering process initially started as a way to prolong that harvest time.  It eventually morphed into having the long lived pepper plants that I do now.  These overwintered pepper plants don’t need to do all of the early growth that first season plants do and end up producing fruit earlier in the season due to this.

    Starting Peppers From Seed

    Starting the types of peppers that I enjoy from seed is often a tricky process.  I won’t necessarily go into detail here as I’ve found that each variety seems to differ slightly in what works best.  Almost all of them though require some form of warmth during the germination process.  I’ve written before about my indoor seed starting and growing setup.  When I’m starting peppers from seed, they go through the full lifecycle described in this post.  This tends to be the most difficult part of the process.  When this is successful, I want to make the most of it.

    Growing in Containers

    Many people who overwinter peppers will actually dig them up before bringing them inside.  For the most part, I’ve opted to grow them in containers.  Growing in containers makes it easy to eventually move them inside.  There are other benefits as well.  You can move the containers around your yard.  I do this for several reasons.  You can optimize their sun exposure and move them out of rain (peppers hate being overwatered).  I’ve also been using it as a means to get them out of the way of pests.

    The Pepper Plant Overwintering Process

    The overwintering process is fairly easy.  If you don’t already plant in containers, you’ll have an extra step.  Get ready to dig up your plants and then transfer them into containers.  Beginning this process usually signifies the end of my gardening season as it typically is one of the last things I do.

    When to Start

    I start to think about the overwintering process when night time temps start to consistently dip below 50 degrees Fahrenheit.  Whatever you do, you want to make sure that your pepper plants are inside before there is any threat of freezing.  Before bringing your plants inside, you want to blast them with a high powered stream of water.  This removes any pests that might be hanging on.  This is one of the biggest issues that you’re likely to encounter during this process.  If I see evidence of pests, sometimes I’ll spray with an insecticidal soap solution and then follow that with another high powered water stream.

    Bring Pepper Plants Indoors

    At this point, you can bring the containers inside.  Usually, many will still have fruit and flowers.  Unless you have a serious indoor gardening setup, there’s little hope that those flowers will mature into fruit.  It’s best to remove all of the flowers.  If you have the space, you can put them in a warm, lighted spot until you harvest the remaining fruit.  After this occurs, you can move on to the next step.

    Induce Dormancy

    At this point, we want to coax the pepper plants into going dormant.  This makes it much easier to overwinter them.  When this occurs, they won’t put any energy into growing or flowering.  I do this by cutting all of the leaves and most of the stems off of the plants.  These pruning shears are my favorite way to make clean cuts.  I usually cut them down so that there are no more than 3 or 4 ‘stems’ above the first branch point.  I cut all of these back just above the first branch node above the first branch point.  Now you can do another check for any pests and deal with them if necessary.

    The final step in inducing dormancy is to move the containers to an unheated garage or another spot that maintains a temperature around 50 degrees Fahrenheit.  You don’t really need direct light here.

    Overwinter

    Congratulations!  You’re successfully overwintering peppers.  At this point, you can mostly forget about them until Spring.  Check on them every week or two to make sure nothing weird is occurring.  You should water them lightly once or twice a month.

    Spring Revival

    Shortly after your last frost, you need to bring the pepper plants out of dormancy.  You initiate this by moving the containers some place warmer that gets more light.  If you have a dedicated indoor gardening space, that’s great.  If not, move them to a south facing window and keep them warm.  At this point, you can also start watering them more frequently.  It’s also a great idea to fertilize them using your method of choice.  Once you start to see signs of new growth, you can begin to put them outside for a bit each day to harden them off.  When night time temps are consistently above 50 degrees Fahrenheit and you’ve hardened them off, it’s time to move them outside permanently.

    Conclusion

    Are you overwintering pepper plants?  If not, what’s holding you back?  What tricks and tips do you have to make this process most effective?  Drop me a line and let me know!

  • ScaleBlaster Review

    ScaleBlaster Review

    Every home that I’ve ever lived in has had hard water.  There are pros to having hard water, but there are also many cons.  The cons have led me to investigate ways of mitigating hard water, but this also has additional drawbacks.  I recently purchased and installed a ScaleBlaster.  Read on for my ScaleBlaster review.

    Why Care About Hard Water?

    Hard water tends to be high in calcium and magnesium.  Even though these usually make water taste better, they pose many problems when used in a home water system.  Most noticeable are limescale deposits on water fixtures.  This is visibly unsightly, but also leads to damage and a decrease in efficiency to the overall water system.  Hard water makes dissolving soaps more difficult.  This can make showers unpleasant and over time, can lead to damage to the fibers in the clothes that you are laundering using this water.  The lingering, unsightly residues are really the thing that I hate most about hard water.

    Mitigating Hard Water

    The most common way of mitigating hard water is through the use of a water softener.  A water softener is an appliance that uses ion exchange to replace calcium/magnesium ions with sodium ions.  Sounds great, right?  Well, this exchange of ions results in water that doesn’t taste as good.  Also, if you’re trying to avoid added sodium in your diet, you’ve now created a whole new mechanism for it to get into your body.  Many of the places where I’ve experienced hard water, I never really did anything to mitigate it and just dealt with the associated problems.

    The first home that I purchased had a water softener.  I liked not having the visible telltale signs of hard water, but I quickly got annoyed by having to replenish the ‘salt’ in this water softener on a regular basis.  I also noticed that the quality of my homebrew was drastically decreased.  Hops and malts were muted and the mouthfeel of my frequently brewed recipes was ‘off’.  Before this, I hadn’t really given much thought to water chemistry during my brew days.  After a bit of research and getting my ‘post-softener’ water tested, it was clear that this was likely the cause of my brewing woes.  I had one water tap that was pre-softener and I started using that for all of my brewing.

    My current home also came with a water softener.  One of the first things I did was setup the ability to completely bypass it so that with the flip of a few valves, I could have unadulterated water at any tap in the house.  This information will come in handy later.  When brewing, or filling my hot tub, I’d make sure to completely bypass the softener as well.  I still had that annoying problem of having to constantly load the softener with salt and thought that there had to be a better way.

    My ScaleBlaster Review

    Searching around for alternatives, I eventually discovered the ScaleBlaster.  I had my doubts, but finally pulled the trigger when there was a sale on one at Costco.

    What is the ScaleBlaster?

    The ScaleBlaster is a Made in the USA ‘electronic descaling device’.  You install it early on the incoming water line.  This install involves wire wrapping your water pipes in a very specific manner, hooking this wire up to the ScaleBlaster and then plugging the ScaleBlaster into a regular electrical outlet.  The device than produces an oscillating electronic field that changes the calcium molecules.  This causes the ions to precipitate or collide with each other, to the point that they no longer deposit and just come out the other end of your pipes.

    This sounded very interesting.  Technically, it wasn’t softening the water.  My water would still taste great.  I could brew with it.  Best of all, no need to reload with salt!  The ScaleBlaster promised to eliminate the visible problems of hard water.  Even better, it claimed that the alteration of the calcium ions would also allow the water to remove pre-existing scale deposits from my pipes and equipment.

    How did I test?

    Since the ScaleBlaster isn’t actually softening the water, I couldn’t test my water before and after to see how well it works.  Instead, I turned off the water softener for a few weeks before install.  I then took note of how the scale built up on my water fixtures.  Another great visual indicator came from my sprout growing process.  For growing sprouts, you need to run cold water over the top of the tray several times a day.  With the softener off, the top of the tray had noticeable scale development in between waterings.  Now that I had a few objective measurements in addition to the subjective ones, I was ready to begin.

    The Plan

    My plan was to install the ScaleBlaster, bypass the water softener and let it operate for two weeks in this state.  After this time, I was going to do a deep clean of all the fixtures and surfaces to remove the scale.  Then, I would run things for another two weeks and see how things compared to running without the water softener.

    Installation

    Installing the ScaleBlaster was straightforward, but fairly involved in order to make sure everything was perfect.  The biggest issue was the wire wrapping.  It took the better part of an afternoon to properly do the wire wrapping.  This was mostly because I was working in a tight space and had a difficult time perfecting a method to easily manipulate the several feet of wire that needed to be wrapped.  I placed the ScaleBlaster downstream of my existing water filter as recommended in the instructions.  This also allowed me to plug the ScaleBlaster into the same electrical outlet

    Conclusion

    It took a few days, but subjectively, I felt that the ScaleBlaster was working.  Long before doing the ‘deep clean’, I noticed that I was no longer seeing evidence of scale on my sprout trays.  After doing the deep clean, things actually stayed clean.  One annoying issue did develop though… a few toilets in my house started emitting a high frequency whine.  This usually occurred while water was running in other parts of the house.  We discovered that a slight jiggle of the bits inside the tank usually stopped this, but it would regularly come back.  Eventually, I did a deep clean of all components in the tank and this seems to have resolved the issue.

    So is the ScaleBlaster worth it?  It’s been over a month and I haven’t put the original water softener back into rotation.  I’ve read reviews online and some people with very hard water did not seem to have the same experience as me and either returned the ScaleBlaster or used a water softener in conjunction.  Personally, I’m happy with the current setup and knowing that I can easily add the water softener back into the mix if I need to do so.  Have you used the ScaleBlaster?  I’d love to hear about your experience and how you deal with hard water issues.